

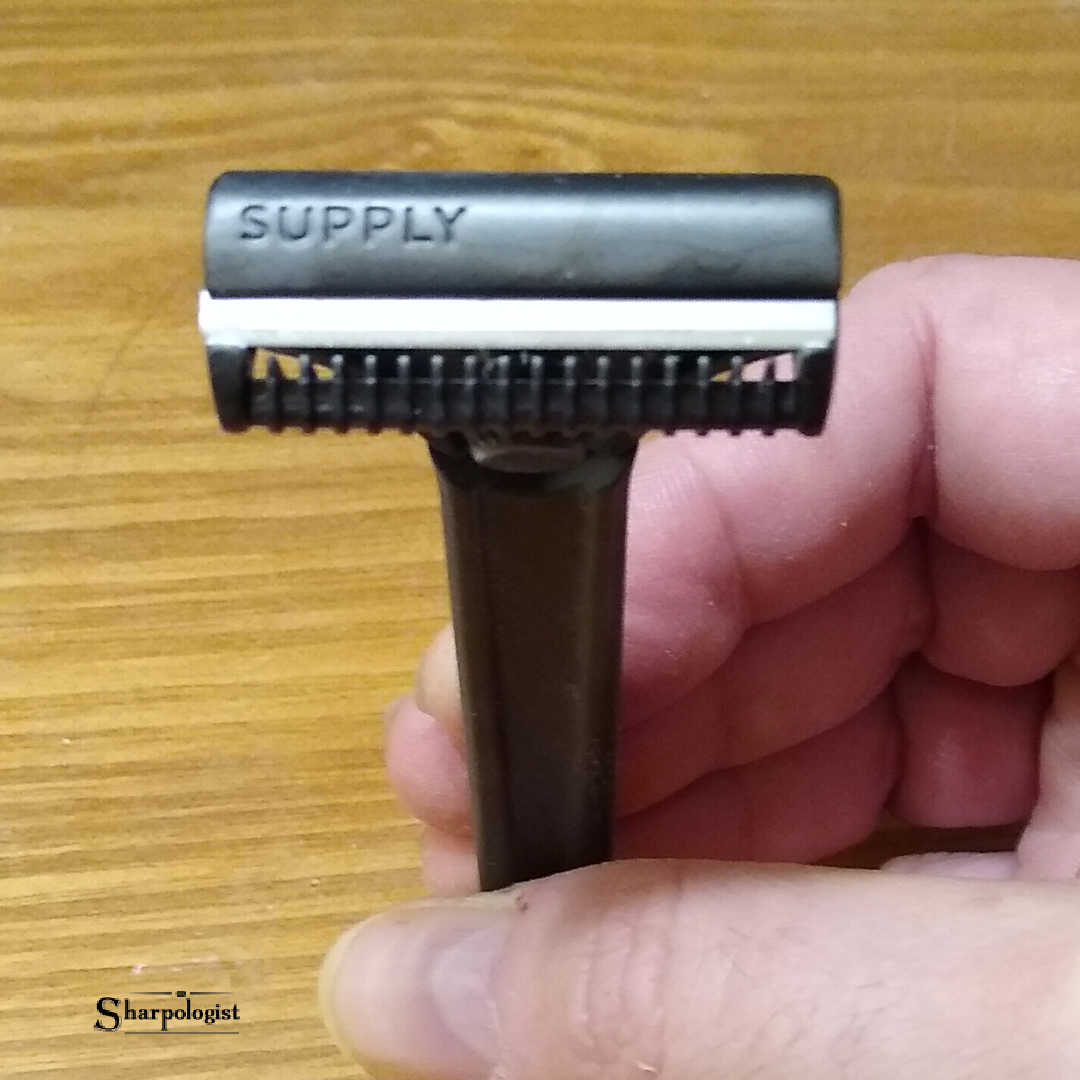
The Supply SE is designed to make single-edge shaving approachable, but approachable doesn’t mean automatic. Your first few shaves are less about forcing a perfect result and more about learning how the razor responds to contact, pressure, stroke length, and beard direction.
The short answer: keep the setup stable, use light contact and short controlled strokes, and change only one variable when something feels wrong. Some remaining stubble after the first pass is normal. A second light pass is normal. Give yourself eight to ten shaves before making a final judgment, while treating irritation or tugging as a reason to stop and diagnose the problem rather than push through it.
[Editor’s Note: This video and article is sponsored by Supply. Supply, collabs, and geni.us links may be affiliate.]
What The Supply SE Asks You To Learn
A cartridge razor is designed to feel familiar almost immediately. The Supply SE occupies a different place. It uses an injector-style blade, and the relationship between the head, blade, and skin may not feel exactly like either a cartridge or a traditional double-edge safety razor.
One of the most important differences is the relatively low blade feel. That can make the razor feel smooth and unintimidating. It can also be misleading: because you do not feel much blade, you may press down to make sure the razor is cutting. That’s the habit to watch.
During the first eight to ten shaves, the goal is not to prove that the razor can deliver a perfect finish on demand. It’s to establish repeatable cutting contact without adding pressure, then learn how your beard direction and pass structure affect the result.
Before The First Shave, Control The Variables
The razor ships with a red dummy blade installed, so load a shaving blade before the first use. The Supply SE accepts injector-style blades, including compatible standard injector blades, rather than locking you into a closed, proprietary system.
Take a moment during loading: keep the injector aligned with the razor, push the blade in smoothly, and avoid dragging the cutting edge against the blade stop. Then inspect the blade placement. It should sit evenly, with a clean edge and nothing visibly crooked.
The blade check is important because a blade that’s damaged or poorly seated can feel tuggy, rough, or inconsistent. Without checking the blade, it’s easy to blame your angle or the razor itself for a problem that began during loading.
Keep the rest of the setup familiar. Clean and hydrate the beard, build a slick lather, and use post-shave products that already agree with your skin. Testing a new razor, blade, soap, and aftershave at the same time makes it much harder to identify what helped or hurt the shave.
FIRST-SHAVE SETUP: A correctly seated blade, familiar preparation, slick lather, light contact, and no rush.
Find Clean Cutting Contact Without Chasing A Number
Begin by placing the head of the razor lightly against your face. Do not begin by putting too much pressure on the razor into the beard. Adjust the handle until the blade begins cutting hair cleanly, then pay attention to the sound, feel, and reduction you get from the stroke.
If the contact is too shallow, the razor may skip or leave too much stubble. If it’s too steep, the stroke may feel rough or scrape the skin. The useful position is where the blade cuts hair without making the skin feel scraped.
Finding that contact is only the first half of the job. You also need to maintain it through the stroke. A common mistake is to begin correctly, then roll the handle by flexing the wrist. That changes how the blade meets the skin and can produce a patchy or inconsistent result. Keep the wrist steady and let the arm guide the stroke.
Why Low Blade Feel Can Lead To Too Much Pressure
Pressing can feel reasonable when the cutting edge is difficult to sense. A cartridge user may also be accustomed to pressure as part of keeping a pivoting head engaged. With the Supply SE, that familiar habit can work against you.
Do not press to find the blade. Use only enough contact to keep the razor stable and allow it to move through the lather. If the razor is not cutting well, reset the contact before adding force.
Short strokes make this easier. Long strokes create more opportunity to lose the working position, roll the handle, or increase pressure without noticing. Two or three short strokes, followed by a rinse and reset, give you more control and clearer feedback.
KEY DIAGNOSTIC: Low blade feel does not mean the razor needs more pressure. If cutting is inconsistent, check contact and blade condition first.
Treat The First Pass As Beard Reduction
The first pass does not need to finish the shave. Its job is to reduce the beard comfortably. If some stubble remains, that doesn’t automatically mean the razor is failing or that you need to press harder.
Relather and use a second light pass where needed. Keep the contact stable and the pressure light. Closeness should come from controlled reduction across passes, not from forcing the blade into the skin during one pass.
This distinction is particularly useful during the learning period. It separates two different questions: is the razor cutting, and is the shave finished? A razor can be cutting correctly even when one pass has not produced your preferred closeness.
Why The Neck May Behave Differently
If the cheeks shave comfortably but the neck feels rough, irritated, or uneven, the razor may not be the main problem. Beard direction on the neck often changes from one small area to another instead of growing uniformly downward.
During the first eight to ten shaves, make the first neck pass predominantly with the grain. You do not need to follow every microscopic change in direction, but a simple grain map can keep you from repeatedly shaving a difficult patch against its natural growth pattern.
Do not judge the entire razor by one troublesome area. Treat the neck as a local diagnostic problem. Note where the result changes, then adjust that area without rebuilding the whole routine.
Diagnose The Result Before Changing Anything
When a shave disappoints, the quickest response is often to change several things at once. That may produce a different shave, but it rarely teaches you what caused the problem. Use the result to choose one likely adjustment.
| Result | Check first | Next adjustment |
|---|---|---|
| Rough or scraping | Cutting contact and pressure | Reset the head lightly, find clean cutting contact again, and reduce pressure. |
| Not close enough | Pass structure | Relather and add a light second pass before increasing pressure. |
| Neck irritation | Beard direction | Map the problem area and begin predominantly with the grain. |
| Tugging | Blade condition | Inspect the blade seating and replace the blade if tugging persists. |
| Patchy or inconsistent | Contact through the stroke | Shorten the stroke and avoid rolling the handle with the wrist. |
| Several problems at once | Number of changing variables | Return to familiar products and change one element at a time. |
Make One Change From One Shave To The Next
A useful first-week progression is deliberately boring. Keep the preparation and products stable. Correct pressure first. Refine cutting contact next. Add a second light pass when the shave needs more reduction. Check the blade when performance changes suddenly.
The phrase “eight to ten shaves” can refer to two different things here, so keep them separate. First, eight to ten shaves is the learning period recommended before making a final judgment about the razor. Second, a blade may also have general lifespan guidance expressed in shaves. Blade condition still outranks the calendar. If a blade tugs, skips, or becomes inconsistent, replace it rather than forcing it through another shave.
After shaving, rinse your face and use the post-shave product that normally works for you. Give your skin a little time to settle before judging comfort. Rinse the razor, shake off excess water, and store it dry. An elaborate maintenance ritual is less important than avoiding a consistently wet storage condition.
THE FIRST-WEEK PATTERN: Keep the setup simple, make small adjustments, and let the result of each shave tell you what to change next.
Learn The Razor Before Judging The Razor
Your first week with the Supply SE is not a test of whether you can force a perfect shave on day one. It is a short learning process. Keep the pressure light, maintain clean cutting contact, use short strokes, and make one adjustment at a time.
If you are deciding whether the Supply SE is the right razor for you, the full Sharpologist review covers its comfort, efficiency, blade choices, construction, and overall fit. Read the complete Supply SE razor review.
Click here to learn more about the Supply SE razor. Use coupon code SHARPOLOGIST10 for 10 percent off.
