

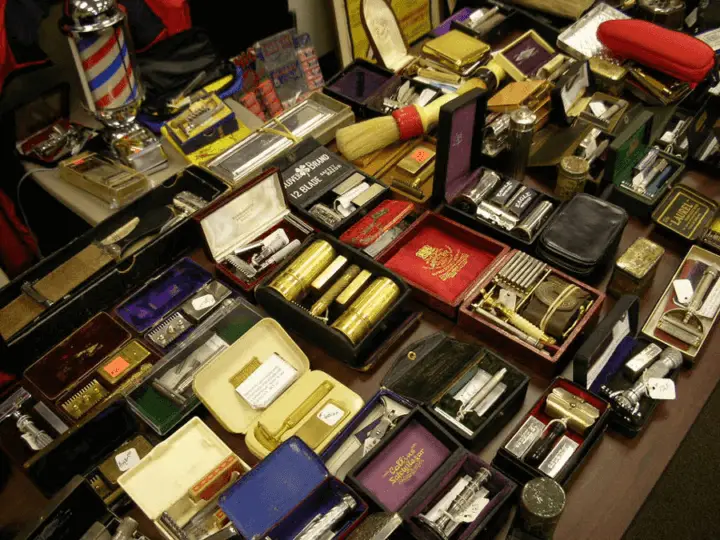
You have made an investment in your shaving gear. How do you take care of your investment? Here are some suggestions on how to properly maintain razors, brushes, and even creams and soaps so they perform better, longer.
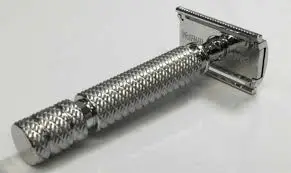
Razors
(Amazon links are affiliate.)
You are (hopefully) at least rinsing and drying (even just air drying) your razor after every use. But it’s probably a good idea to give it a better clean-up periodically. How often will largely depend on the mineral content of the water you’re using but I would suggest at least once per year.
Although razors are made from different materials (from plastic to Stainless Steel, and even Titanium), most double edge razors these days are usually a chrome plated alloy, most commonly Zamak (sometimes referred to–somewhat inaccurately– as “pot metal”). While some of these materials may benefit from specialized cleaners, luckily there are a couple “generic” options that should work just fine for pretty much any razor.
Basic Cleaning With Soap And Water
As long as you keep it from getting really dirty in the first place, you won’t have to put much effort into cleaning your razor. You’ll need:
- Water
- Mild dish soap
- Soft bristle tooth brush
- Soft Rag (no paper towels)
Fill your sink with warm, soapy water. Disassemble your safety razor and use the rag to clean the different parts of the razor. For harder-to-reach places (like the comb of an open-comb razor) you can use the toothbrush (or even a cotton swab).
Once you have finished, rinse the razor with fresh water, give it a quick towel-off, and set it aside to dry.
Avoid using abrasive cleaners or anything that could scratch chrome. While it is a hard metal it can get scratched.
Basic Cleaning With An Ultra-Sonic Jewelry Cleaner
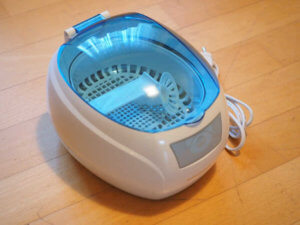
Ultra-sonic jewelry cleaners can to a terrific job cleaning up razors. Try to find one with a power rating of at least 60 watts. Using a smaller cleaner may be OK but you will probably have to run a razor through several cleaning cycles (I had a 35W unit a few years ago and I usually had to run razors through at least twice). Michael (“Leisureguy”) offers more detail: here is a link to a post he did a few years ago about ultrasonic cleaners.
Deeper Cleaning
It is commonly suggested to soak the razor parts in a diluted vinegar and water solution to help dissolve the scum. You can try mixing one part vinegar with four parts water and soaking for ten minutes (some say up to an hour but I think that is too long). Then use your rag or toothbrush to clean the razor.
If vinegar by itself doesn’t do the job, you can also try adding in some baking soda to vinegar to form a paste. Then use your toothbrush to scrub the razor with the paste.
However be very careful using vinegar on stainless steel razors unless it is very diluted. Vinegar at high concentration can damage stainless steel. You may want to try testing it on an inconspicuous part of the razor first. For more specific information on cleaning Stainless Steel see Stainless Steel vs. Rust here on Sharpologist.
After you are finished cleaning again, rinse with warm fresh water and allow your razor to dry completely before putting it back together.
Removing Rust On A Zamak Razor
Although Chrome itself is generally resistant to corrosion there can actually be microscopic holes that lets the base metal oxidize.
If this happens, you can first try equal parts vinegar and salt. Use this to lightly scrub the rust stain. Try to only apply enough pressure that is needed. You will essentially be scratching off the rust so you don’t want to unnecessarily scratch other areas of the chrome.
If vinegar and salt doesn’t work you can try crumpled up aluminum foil which will be slightly more abrasive. Again, go with caution.
If these do not work, you can try steel wool as a last resort. You can also try other acidic materials in your house such as a brown soda.
The chrome plating on the threads of the razor comes off with friction as the threads repeatedly scrape against each other. Once that happens, the underlying Zamak corrodes easily.
Pay special attention to the threaded post attached to a razor’s top cap. Lubricate the threads of the razor regularly with Vaseline, grease, or oil once a month or so. Alternatively, wrap Teflon tape around its thread. Teflon tape can be found in the plumbing supplies section of hardware stores and megamarts. You’ll have to scrub off the scum in between the threads with an old toothbrush & soapy water first. A single round of tape is enough.
For even more information on cleaning razors, read How to Clean and Care for Your Favorite Double Edged Safety Razor here on Sharpologist.
What About Blades?
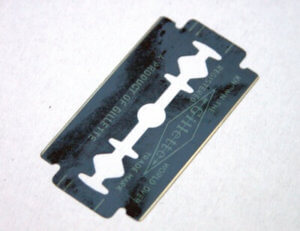
I do not do anything with my blade except a quick rinse in water (while still in the razor) and a wipe on a towel by drawing the razor/blade in the opposite direction of shaving. That is all I seem to need.
That said, there are some strategies that can help prolong the life of a blade if you wish.
There are a number of strategies that can extend the useful life of a razor blade by slowing down the dulling and oxidation processes. Exactly how slow depends on a number of variables, including the metallurgy of the blade, the mineral content of water used for shaving and cleaning the razor, the type of hair being shaved, and even the ingredients of the lather used to shave. However, in my own research I am able to at least double the life of my blades using any of the techniques or products I’m about to describe.
It seems like the best way to extend the life of a blade is to keep it clean, dry, and away from air. This keeps tiny particles picked up from the skin off the blade and slows oxidation which eventually creates chips along the blade edge. Cleaning and drying actions can be combined by rinsing the razor in hot water, then wiping it in the opposite direction from shaving. I use a dry towel but I have seen others do it on denim or even the skin of the forearm.
Wiping the blade like this is a form of stropping. By the way, stropping is not really sharpening, its more like polishing off tiny bits of shaving residue from the blade edge and re-aligning the blade edge somewhat. Of course, in the case of a multi-blade razor you’re only stropping one side, but one side is better than nothing.
There are some products that claim to make this cleaning process a little more effective. Razorpit uses a rubber-like surface to clean the blade edge like a squeegee on a glass window. You use a little left-over lather as a cleanser, running the razor over the surface. Then you rinse and dry. Bladetap is a similar product.
Another strategy to slow the oxidizing of the blade is by coating the blades with a thin layer of skin-friendly oil. Cooking oils are commonly used. I like plain ol’ olive oil (no need for the “extra virgin” stuff): its widely available, cheap, and sticks to the blade pretty well. If you regularly use pre-shave oils, you can try some of that. Apply a thin layer of oil with a cotton swab or immerse the whole razor head in a small amount of oil.
One less messy alternative is Pacific Shaving’s Blade Oil, a combination of oils that stick well to the blade’s surface.
Shave Brushes
Routinely, cleaning a shaving brush after use is probably as simple as a thorough rinse under warm running water (gently “pumping” the brush hair with your hand or in a bowl until the water runs clear). Give the brush hair a gentle squeeze to remove most of the water (don’t “flick” it with your wrist as it may loosen the hair knot’s glue plug over time) then wipe the handle and hair dry with a clean (and dry) towel, “fluffing” the hair outward (some use a small-tooth comb if necessary). Finish by placing the brush in an out-of-the-way area that gets some air circulation (not in a closed cabinet!) to complete the drying process.
For a deeper cleaning you can try a number of products including:
- Pet Shampoo
- Distilled White Vinegar
- Mild Liquid Dishwashing Detergent
- Laundry Booster (“20 Mule Team”)
- Classic Shaving Brush Cleaner
- PAA Brush Cleaning Soap (affiliate link)
- Ulta Makeup Brush Cleaner
- The Stray Whisker Brush Cleaner
Regarding the use of distilled white vinegar, once again you do not use it at full strength: in a mug, measuring cup, or other vessel with tall sides, mix a solution of ONE part distilled white vinegar and NINE parts hot water. The water should not be extremely hot though–temperatures near boiling may damage the brush’s hair.
Place the brush bristle side down in the vessel–the solution should come up to the base of the hair knot.
Soak the brush for about ten minutes, agitating the brush with a pumping motion occasionally.
Remove the brush and examine the base of the hair knot. If there still is visible residue you can use a tooth brush to gently scrub the area with a motion that goes in the direction from the base to the tips.
For more detail on how to use the other products listed above, read 8 Ways To Clean A Shaving Brush here on Sharpologist.
No matter how you deep clean you will want to finish the process the same way as described earlier: rinse with lots of warm water, give the brush hair a gentle squeeze to remove most of the water, then wipe the handle and hair dry with a clean (and dry) towel, “fluffing” the hair outward, then placing the brush in an out-of-the-way area that gets some air circulation.
Creams And Soaps
It’s worth mentioning that shaving creams and soaps don’t require “cleaning” (duh.) but there are a couple tricks to keep them lasting longer.
If you use a shave soap, keep the lid off for at least a few hours (even all day) to let it dry some of the foamy lather residue dry. Then lid it up. That should keep it from getting…funky…over time.
Shave creams in a jar or tub may start to dehydrate over time (probably a year+). A few drops of water stirred into the jar should perk up the creaminess a bit, though the scent of the cream will probably continue to fade over time.
Conclusion
Your razor should be a long-term purchase for you for economic, performance, and even heirloom reasons so it makes sense to take good care of your gear for best performance. You don’t have to do it very often and it can be a simple, occasional task.
What do you do to maintain your shave gear? Leave a comment below!

Since it’s been shown that rust won’t develop within 24 hours, I simply rinse the razor (containing the blade) in hot water, BLOW swiftly on each razor edge to take the water off the edge, and store it in a dry place. There’s a reason many blades say “do not wipe blade”.
You don’t want to take away the platinum coating, do you?
Like other commenters have said, blades are cheap. I get 4 good shaves before disposing one.
YMMV
Off and on for the past few years I’ve soaked my Safety Razor in a solution of Water and Barbicide before and sometimes after, every shave for 5 to 10 minutes. Roughly five days a week.
Doing so provided sanitation and great cleaning effects. Even at the manufacture recommended dilution, the Barbicide solution would remove soap scum very easily. I enjoyed this because cleanup was very easy and rarely required physical wiping or scrubbing.
The bad news is that over time it seemed to remove the plating of two different Safety Razors and exposed the cast metal underneath, then further on corroding and removing metal.
I’ve been trying to find a fine balance for the solution to not ruin Safety Razors in the future.
I only use a blade about three shaves. I don’t remove my blades between shaves. I do swish the razor head for a few seconds in isopropyl alcohol to displace the water though. When I move to a different razor I clean the last one with dish detergent and a soft toothbrush.
I’ve never understood the need to try to prolong the life of a razor blade. Even the most expensive blades, like Feathers, are relatively cheap when purchased in bulk.
I use a fresh blade every day. I’ve found the sharper the blade, the better the shave plus I get fewer nicks and scrapes. I don’t have to track the number of times I’ve used a particular blade and never have to deal with pulling and tugging.
Blades are cheap. It’s my face that’s expensive.
Some blades, the Feather and Personna Red are a couple that comes to mind, for me at least shave smoother on the second day than the first time.
# my mileage varies?
Two suggestions. First, be careful with the ultrasonic cleaner. It can ligthen or eliminate the numbers on adjustable razors.
After I shave I loosen the head of my razor and run it under warm or not water. I then dip it in rubbing alcholol to dissipate the water. When I change the blade of my razor I use Scrubbing Bubbles (non-bleach) and a soft tooth brush to clean the razor.
Interesting article, Mark. Thank you for posting it.
Just to share another alternative, I clean my safety razors by soaking in a weak solution of “Finish Jet Dry” rinse aid, which is made to help dishes get spot free in the dishwasher. It is intended to bust up soap scum on dishes, so I thought it might work on razors, and it does a great job. Soak – rinse – done. You can get the product at the grocery store or online.
I never thought about a rinse aid! I’m definitely going to try that.
Comments are closed.