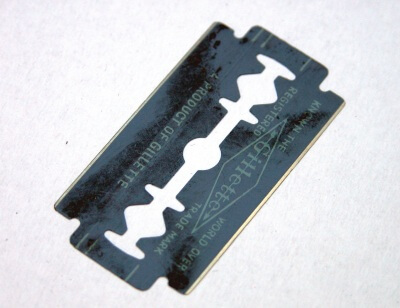
My friends at Stag Barbershop, the place in Milwaukee I gave a presentation at last year, contacting me recently with a problem. It seems like some of their clients have difficulty replacing their safety razor blade and wanted to know what the right way was to do it. Well…I don’t know if it’s the “right” way but I can show you how I do it.
There are some variables in the mix here. You have single piece, twist-to-open razors, two-piece razors, and three piece razors. Then you have blades that come out of a magazine unwrapped, another type of magazine with the individual blades wrapped, or razors individually wrapped in a simple box…either in bulk or in smaller containers.
The twist-to-open razor with unwrapped blades out of a magazine is probably the simplest, most convenient combination. Simply open the razor pluck out the blade and deposit it in the used blade slot in the magazine. Then partly slide out the next new blade and slip it into the razor. Twist to close and you’re done!
Lets look at individually-wrapped blades for a moment. They may come in a single wrapper or in a double wrapper like this one. There may be also a small dot of adhesive on the blade so the wrapper stays closed. I’ll discuss the adhesive more in a moment. Simply unwrap carefully and be sure to grasp the blade by its ends and never on the blade edge side.
The adhesive residue can cause some annoyance when removing a blade from a two or three piece razor. Usually the blade will just fall out but sometimes it will stick to the top cap of the razor. If that’s the case, after unscrewing the razor grasp the cap by the ends of the the blade and gently push down. I find it is helpful to set the razor cap on a counter, atop a towel so it’s less likely to slip around. Again, remember to handle the blade by the ends and avoid the edge.
Replacing a blade is just a matter of positioning the blade over the mounting posts of the top cap as shown. Two piece razors just need to be mated but three piece razors have the extra mounting plate that goes between the blade and the razor handle. Remember that the mounting plate must be positioned correctly. If you put it on upside down you will not get a very good shave! As you screw down the razor top into the handle I find it helpful to rest a finger on top of the razor. That not only keeps the finger away from the blade edge but also can help position the blade symmetrically so each side is even.


Thanks for the great instruction. I’m just about to ditch my cartridge and take the plunge into the DE world of shaving.
I think I have the essentials (badger brush, merkur HD 34c, 3 different shave creams – proraso, Geo F Trumper and Taylor of Old Bond Street – a styptic pen and an alum block.
FIRST, what would be my best option for a pre shave treatment (e.g. oil or balm) and what would be the best post shave treatment (e.g. balm, splash, something I don’t even know about?).
Thanks for the help
Why you have those dark spots on the skin of the face? It depends on how you shave? And why you have so many razors? Isn’t one razor enough to shave?
Your comment doesn’t deserve a response but I must…shut the F#$@ up.
I use a three piece Merkur razor. Along with this advice, I also recommend changing blades before stepping into the shower or even running the water for your shave. Dry fingers and dry metal have less chance of slipping. The edges of the razor may not be razor sharp, but gripping the head assembly while you tighten the handle could cause the ends of the blades to cut you if you’re careless or your fingers slip. TTO razors probably don’t have this risk, but two piece razors probably do.
Comments are closed.