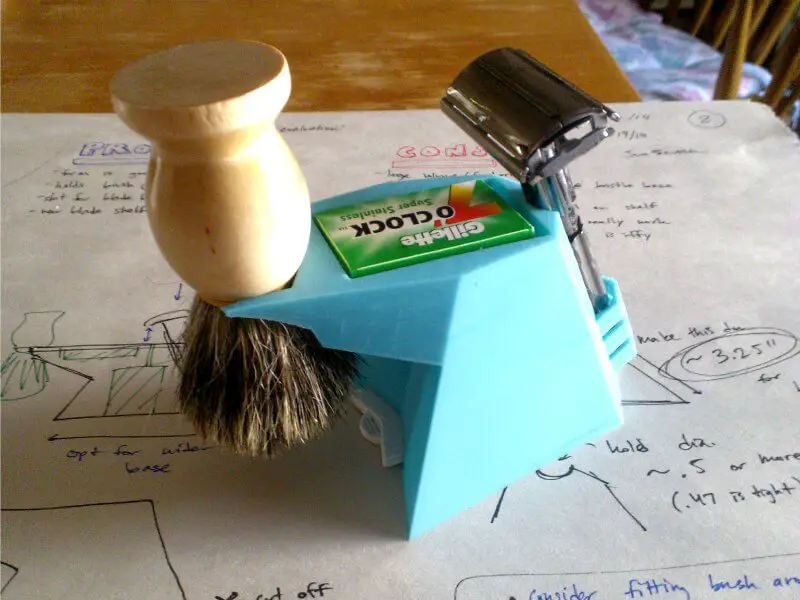
Like many of those already on Sharpologist, I’ve made a regular routine of wet shaving to maintain my appearance. I first took the plunge into this wide, wonderful world last year when I bought a vintage 1930’s Schick injector razor. I’ve since upgraded to a Parker 22R DE razor, and, although my setup is quite humble compared with many others that I’ve seen (shoutout to /r/wicked_edge!), I find that my shaving experience is still profoundly greater than it ever was while using cartridge razors. I decided to use a 3D printer to create a shaving stand for my shaving gear.
(NOTE: This article is image-heavy. The photos have been compressed but those on mobile devices may want to view this on a desktop.)
Why?
The reason for designing this stand was, in the simplest way, because I wanted one. I wanted to keep my gear from having to sit on bathroom surfaces, which I shared with two other college students. While browsing for different kinds of stands to purchase, I stumbled upon several designs that other users made for themselves. While I’m not much of a woodworker, I am an engineering and design student, and by God, not only will I get a new shaving stand—I will make it my own. Thus began an exercise in product design and rapid prototyping.
From the start, I wanted my stand to be unique to me and not something that could easily be found at some store. Fast forward to Spring Break 2014, and I finally had some time to mull over what I wanted the design to look like. To quote the original description of my concept, “Since (wet shaving) is a rather antiquated practice, the stands that accompany them typically share the same quality. Often, they are hand-crafted out of wood, or simply manufactured out of a few metal components. By foregoing the traditionally organic shapes and finishes in order to incorporate much more geometric forms, I was able to create a razor stand that is unique and modern.” Check out the development process:
3D Design Renderings
The most prominent feature is the brush holder, which sticks right out of the front like some sort of cannon/turret thing. In the spirit of linearity, the end is made just like a wrench head (this is where the brush will hang from):
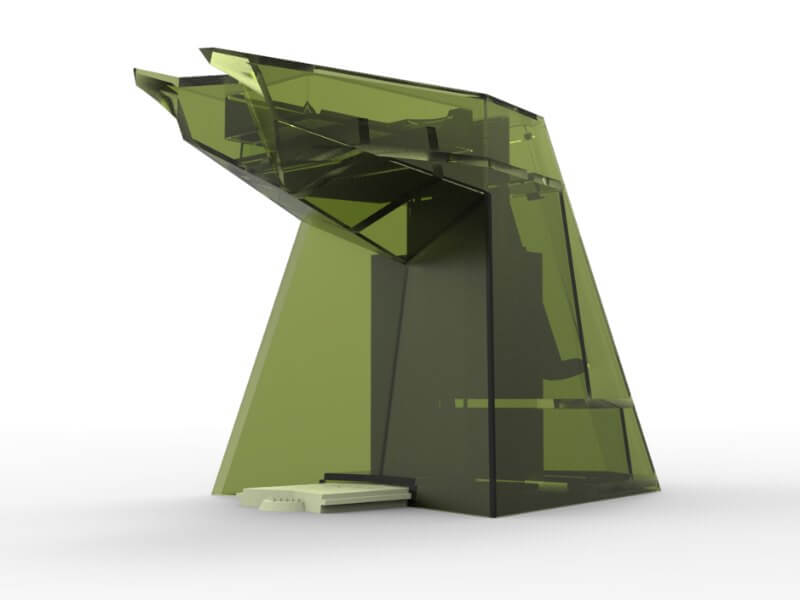
Inside, a thin slot leads from the top and goes into a rectangular compartment. This is for storing used razor blades until they can all be disposed of properly:
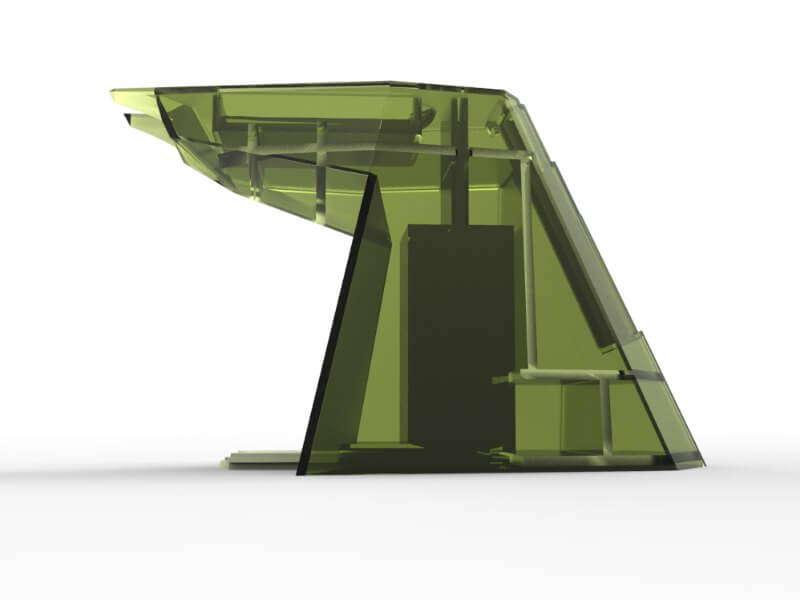
On the back, there is a recess that the razor can stand in between uses. This allows it to dry without a risk of contamination (does it though? I’m kind of just spitballing here, but I like to think it helps):
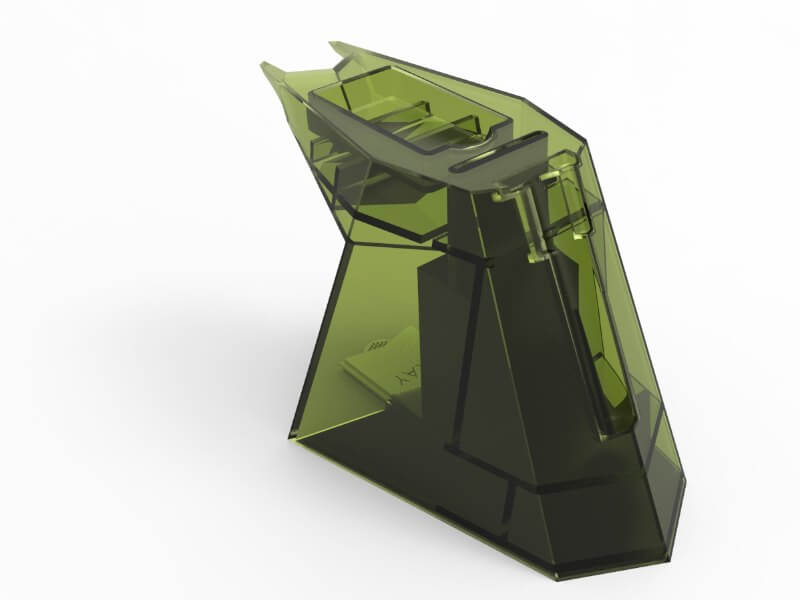
Main overhead shot. There is a small shelf at the very top to hold brand new razor blades. At the base of the stand, a sliding tray can be pulled out to empty the used blade compartment:
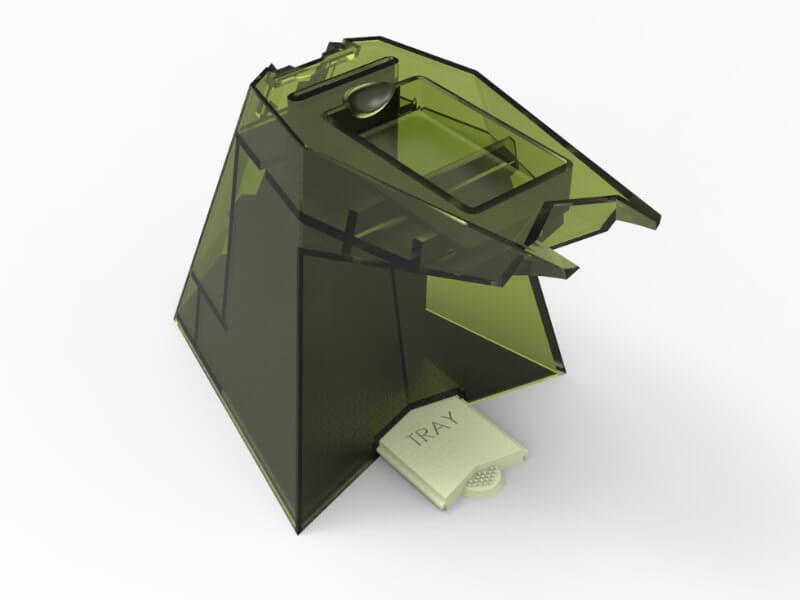
3D Prototyping: Version 1
Got my first prototype and tested it out with all my gear. First things first, this thing is HUGE. It’s probably fine for people with plenty of counter space, but for someone like me who shares a small apartment bathroom with other tenants, it does not at all fit the small form factor that I had originally wanted. Also, I don’t think people typically hang their brushes by the middle of the handle as shown here, but it was surprisingly a much more stable fit this way:
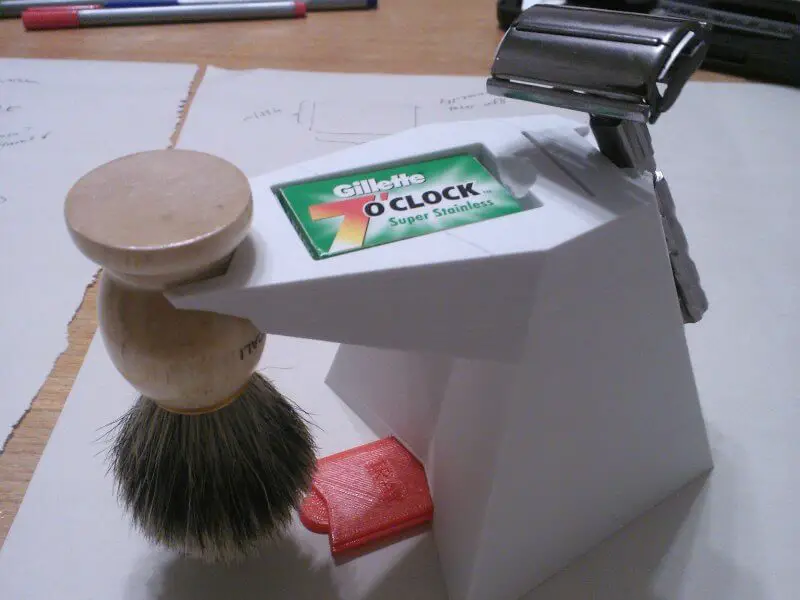
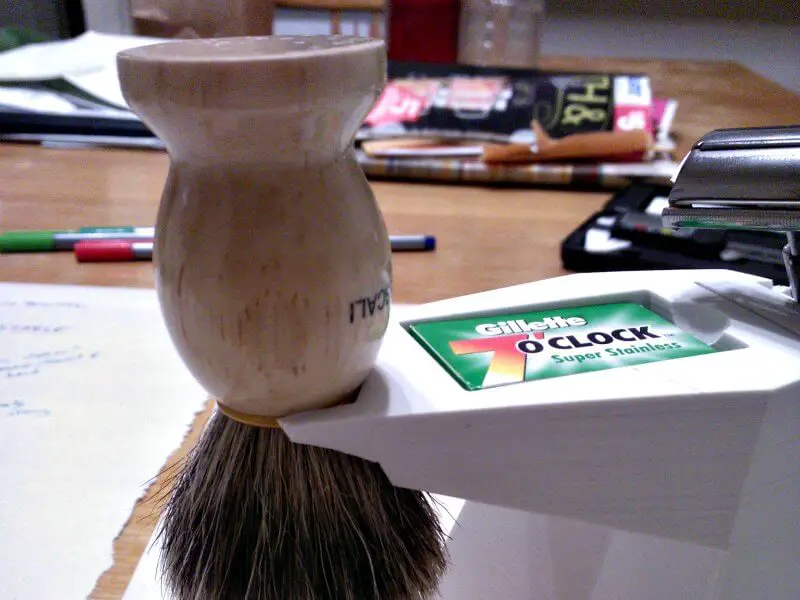
This is how I imagined the brush hanging (and how I plan to keep it in the future). I noticed that this position was a bit more precarious, and the brush was prone to falling off even with just a small nudge on the wrong side:
The new blade shelf was one of the few features that perfectly did what it was intended to do. The sample box fits in there beautifully, and is very easy to remove when a new blade is needed:
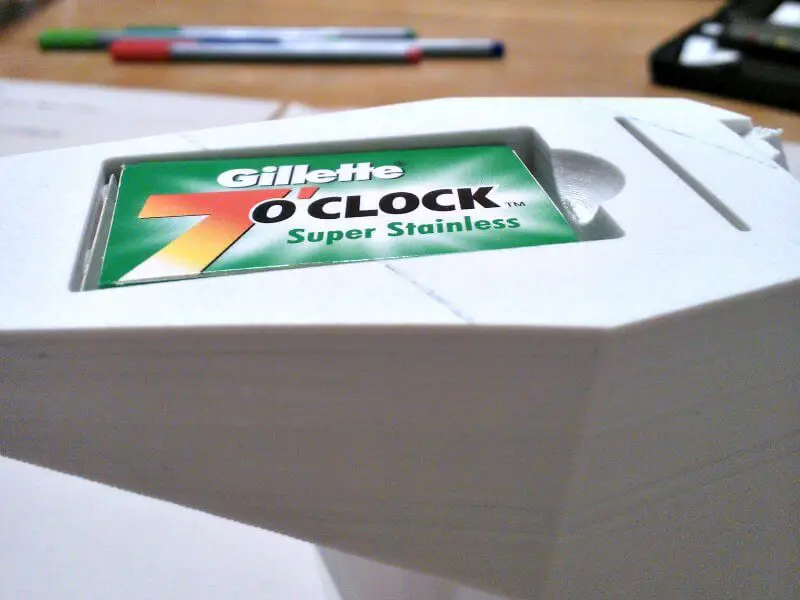
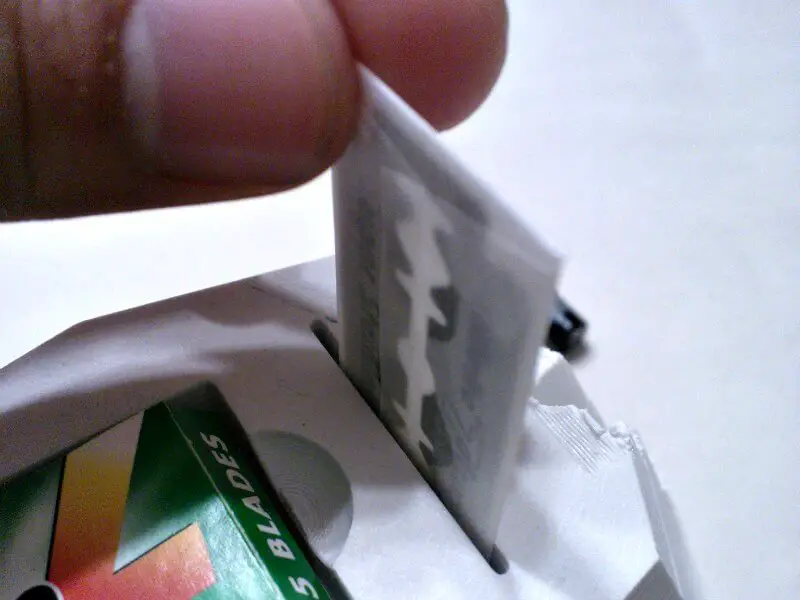
The old blade slot was the second feature to work well. Here I am demonstrating the fit using a new blade. It falls right through with no interference:
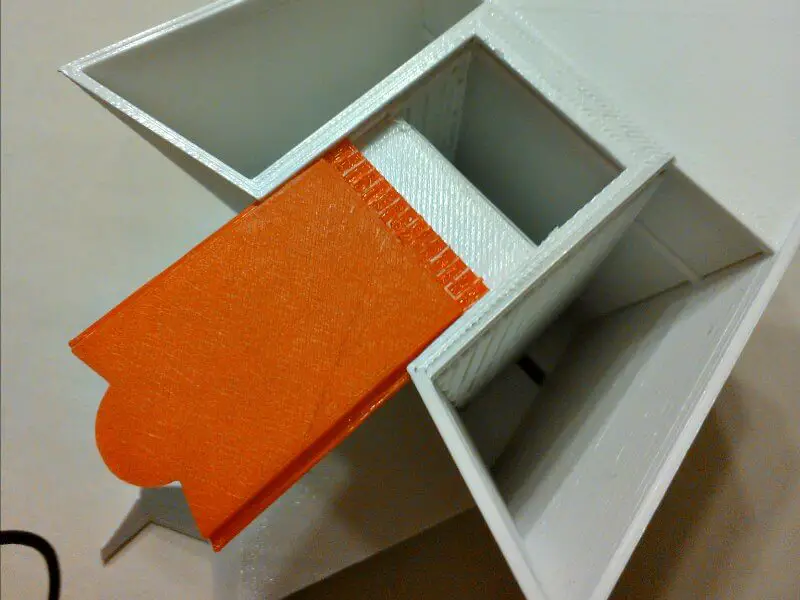
The fit on the sliding tray (it’s really not a tray, but I’ve been using that word so much that it’s just stuck for now) was a bit too tight for the capabilities of the 3D printer, so it couldn’t go in too far without getting stuck:
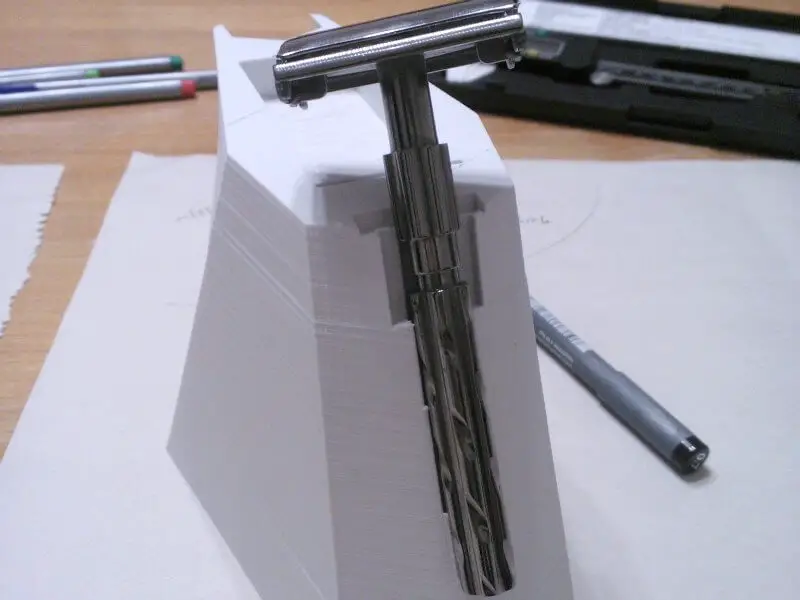
The razor rest fit awkwardly at best. The diameter used here was too close to the actual dimension of the razor handle, and the imperfections of the 3D print caused it to be just a *bit* too small:
Verison 2!
With all of the changes that I was able to point out on my own, I considered the first prototype to be a resounding success! Of course, it was never meant to be perfect on the first go-around (as pretty as the first renderings were), and having a tangible product in my hand helped me find mistakes that would have been difficult to understand otherwise.
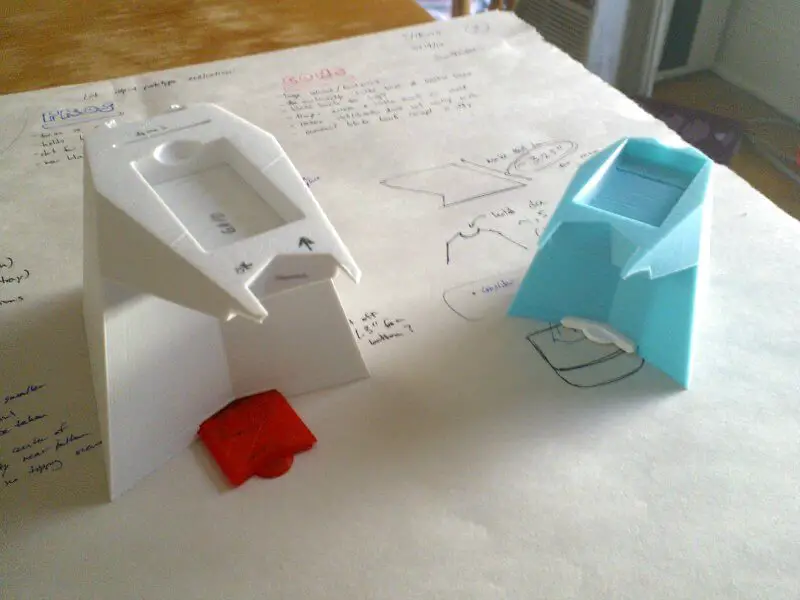
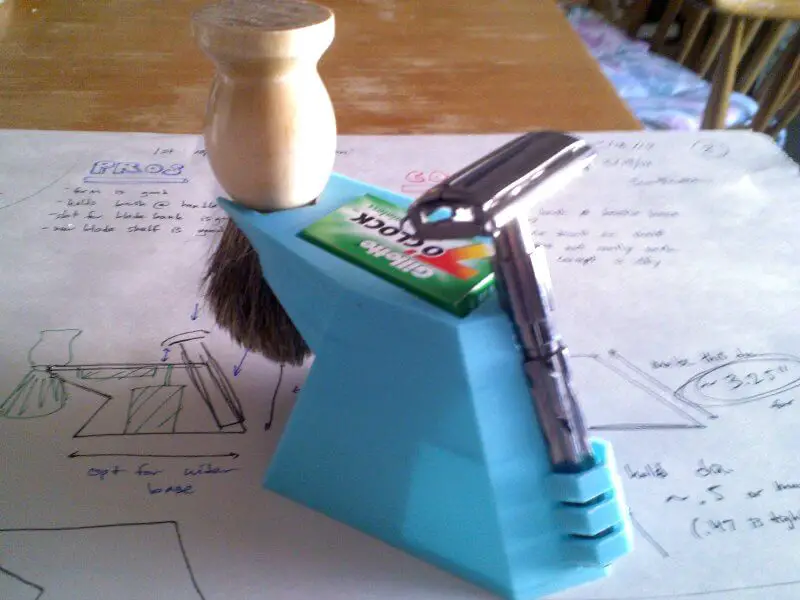
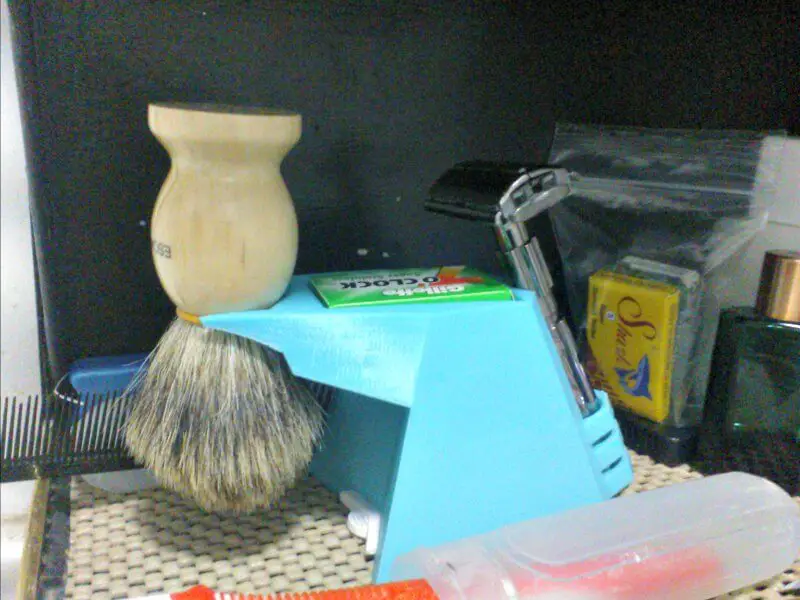
To put some context into how much smaller this version is, the shelf on the top for storing new blades is the same size as on the first version. You can sort of also tell that the brush holder has been enlarged and moved back–this should allow the brush to sit more comfortably with less risk of falling out. The increased size also accommodates larger brushes. The tray was reworked and fits much better now. I am still considering replacing the whole current blade bank system with something else–I received many helpful suggestions and criticisms on the first version in this regard.
Since the razor rest was a bit shallow in version 1, I thought it would be helpful to include these extra restraints to hold the razor handle down at the base. They look like some sort of prehistoric dorsal fins, making the overall aesthetic more aggressive and predatory in my opinion (reminds of something out of Jurassic Park). They do a great job of keeping the razor stable in the rest:
Conclusion
Over the course of about three weeks, I was able to push out two solid prototypes and get great feedback on them from Reddit, my classmates, and my coworkers. While this design has literally been sitting on the shelf since then, I’m about ready to pick it back up where I left off. My stretch goal is to refine the design so that it may be manufactured and sold, but I know that it still has a long way to go before getting to that point. It’s been a great pet project for me so far, and I’ve learned so much just from going through the first two iterations. I’m really excited to see where it will go next!
Huge thanks to Mark for inviting me to write for Sharpologist. Smooth shaving, everyone!
Creative Commons License
This work is licensed under the Creative Commons Attribution-NonCommercial 4.0 International License. To view a copy of this license, visit http://creativecommons.org/licenses/by-nc/4.0/.
Related Posts:
How To Create Manly Heirlooms To Pass Down

3D printing truly is a game changer for entrepreneurs. Wishing you the best of you getting success out on the market!
Couldn’t agree more!
Love it. Engineers are the can do professionals. If you ask them to build a ladder to the moon….they would!
Jeric, Congratulations on overcoming natural inertia and actually making something. I like your design save one thing… The new blade storage may not be the best idea. Since your recess is horizontal and has no drain, water from wet hands, brushes and the like is probably going to accumulate in the recess and that will eventually rust blades, even new ones in wax wrappers. I suggest you consider adding a rare earth magnet somewhere inside the object that will allow a packet of blades to “magically” stick to the side. The side may get wet but it will dry quickly and you won’t be creating a rust bath for your new sharps. Good luck on the project!
Bravo! Very nice project. I really like the modern design. Thanks for the blow-by-blow (with pictures) on the development, While I think it looks great as-is, I am interested to see the final (and marketable) result.
Comments are closed.