

This is week three of Sharpologist’s 30 Day Challenge To A More Enjoyable Shave. Having previously reviewed preparation and lather-building, this week is where “the rubber meets the road” in shaving, with razor technique.
Essential Razor Technique #1: The Importance Of “Grain”
Let’s assume you’ll be shaving your face, though the concepts apply to shaving pretty much anywhere. Last week’s homework was to carefully map how the grain on your skin grows and you were given a choice of three different facial diagrams to map with. Now it is time to put that map to work.
Knowing how the hair grows is essential to a comfortable (and hence, more enjoyable) shave because it allows you to remove more hair per stroke with less chance of irritation, providing more beard reduction more quickly. Understanding beard growth is essential when using a multi-blade razor! It is less essential when using a single blade razor but still important–more on that later.
Grain is also important to know so that if you decide to pull the skin taut to shave you can know which direction to pull. Over-stretching the skin makes the possibility of irritation or ingrown hairs much more likely.
Essential Razor Technique #2: Reduction By Passes
No matter what kind of razor you use, an essential razor technique is to shave in passes, with each pass progressively removing hair more closely to the skin. Even multi-blade razors with their “lift and cut” theory (though some might say it’s more like “yank and hack”) follow this technique, along with the “grain.”
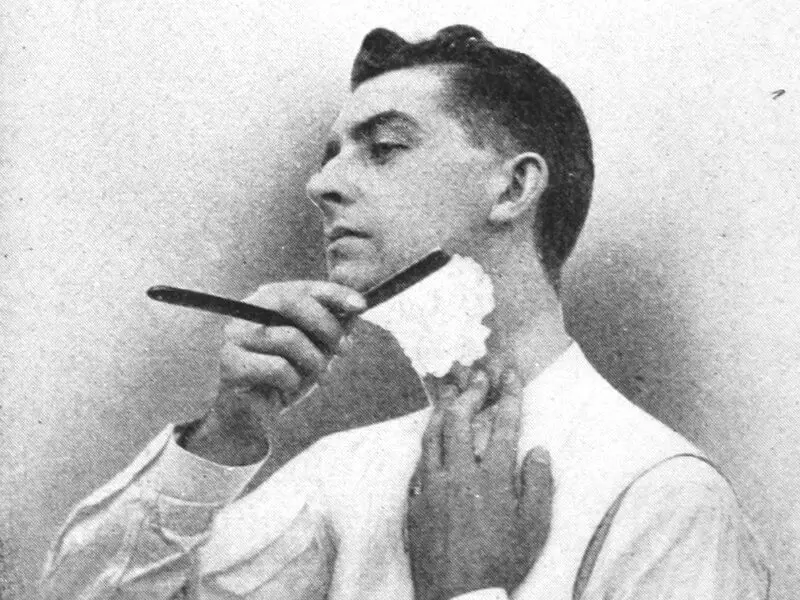
Essential Razor Technique #3: No Pressure
Putting too much pressure on the razor creates a “valley” for the blade, not only reducing the efficiency of the blade but also making irritation more likely. Modern cartridge razors that pivot can partly compensate for too much pressure but don’t rely on it. Hold the razor by the bottom of the handle, tilt your head to one side, and let the head of the razor rest on your cheek. Feel that? That’s the most amount of pressure you want to use.
Essential Razor Technique #4: Proper Blade Angle
If you are not using a razor with a replaceable blade cartridge, you will have to be concerned with the angle where the blade meets the skin. Blade cartridges set this angle for you, with some engineer (or marketer!) deciding what is best for everyone. If you are using a classic double-edge or single edge blade (including a straight razor) you must set this angle yourself.
Essential Razor Technique #5: A Sharp Blade Or Cartridge
It may seem obvious but a good, enjoyable shave needs a good, sharp blade to shave with. That means not using a blade or cartridge that is beyond it’s prime. If you are one of those people who wants to get the most out of a blade or cartridge, HERE are some tips.
Putting It All Together
In some ways the actual shave is almost anti-climactic, as preparation and lathering may be more important to an enjoyable shave. But part of getting an enjoyable shave is that the shave is comfortable and as close as you like, which requires a blade! Here is where you can experiment to find the intersection of close, comfortable, and enjoyable.
- Razor technique with your first pass should always be with the grain and almost leisurely in it’s accomplishment. Don’t worry about getting every last strand of hair or go over the same spot again and again during the same pass: your goal is to reduce the stubble, not eliminate it.
Use your ten minute schedule to try some or all of these experiments, to see what works for you:
- If you are using a single blade without a cartridge (i.e. the classic double-edge razor, a single-edge razor like the “Injector” style, or a straight razor) you might be able to “cheat” the grain a little: rest the razor head (or blade) against the cheek and slowly rock the razor downward until the blade edge just makes contact with the skin, then go just a bit more. Then lock your wrist and shave straight downward, regardless of the “grain.” The angle between the blade edge and the skin should be somewhere between 30 and 45 degrees.
- Relather and repeat the first pass. This razor technique is especially useful for those who are learning single-blade shaving.
- Reduce stubble more slowly. After the first pass relather and shave across the grain (the direction 90 degrees away from the grain). Relather and shave across the grain from the opposite direction. Relather then shave against the grain. Then on successive shaves start experimenting with the final passes (is not shaving against the grain acceptable? Do you need both across-grain passes?) and gauge its effects.
- Segment the area to be shaved into its flattest parts. Take shorter (maybe even much shorter) strokes on curved areas like the chin. Rinse the blade between segments so that you always have a “clean” blade on each part.
- Listen to the shave. Many people consider the sound of shaving to be one of its most enjoyable aspects. You may not hear much using a cartridge razor but many single blade razors produce a deep, satisfying sound and many who use a straight razor listen for a “singing” sound of the razor. In any case, with some experience you should be ale to determine the sound the razor makes when it is cutting properly.
Finishing
Even multiple passes with great lather and careful razor technique may still result in small rough areas. Your first goal before going any further is to determine whether it’s really hair stubble or just a rough (or loose) patch of skin. One way to find out is to simply move on to whatever you do after shaving and an hour or two later check the area. If it feels smooth it is probably because you have a loose area of skin in that area: after the skin returned to its normal muscle tone the skin smoothed out.
On the other hand, if the skin still feels rough a “finishing” razor technique might be necessary on your next shave. This might include an “oil pass,” a “water pass,” or using some advanced razor techniques in specific areas.
- Some advocate various blends of oils to make a very thin coating for “polishing” the rough spots. Leisureguy has an article that goes into much more detail about the oil pass, HERE.
- I have seen a few people use just water for a “touch and cut” of an area. However because water is so “volatile” for shaving purposes it can easily lead to razor burn. Something a little safer to try would be a little additional shave cream applied directly to the area. Others rub a little shaving soap on the area (without lathering).
Advanced razor techniques for finishing a shave are better shown than described:
Be sure to report back here with the results of your experiments!

Did I miss your series on straight razor shaving?
No, it’s been delayed. More info coming soon!
you were going to do a de blade review, did i miss the results???? really enjoy your site,,itisgreat!!!!!!!!!!!!!!!
I have already done some blade reviews but the final one will be next month.
Great article. Your staff has educated more men than many schools. Mantic59 and Liesureguy deserve Doctor of Shavology degrees.
I did get the best shave ever this week, and the key advice seems to have been, loathe as I am to admit it, grain mapping. I did cheat on the homework and used my tablet camera, mirror-reversed images of my beard as necessary, applied a lightening effect, then drew lines in another app. I had always been shaving down my cheeks or slding, and heard corroborating noises near my jaw; but in fact the beard arcs around my mouth. I found it made a BIG difference, as following the grain exactly allowed my razor to pull my face up by the hairs to meet its negatively-exposed blade. It felt rather like a vacuum. That interaction is rather a complex combination of points #1,3, & 4 in this article; and I would add, the blade exposure may also have to be matched to one’s skin elasticity, for which I used a shim. So that first pass, far from being a casual affair, has become a matter of intense intellectual focus, though not physical stress.
Great article. Although the best advice for the shave itself is not to chase the BBS shave. Let it happen, but don’t go to the butcher shop for the sake of a smooth mug… The day I stopped chasing BBS shaves, is the day I started to get them (fewer passes, but knowing the trouble spots and targeting them with finishing techniques).
Probably the most useful piece of advice (but often ignored) in the article is to break the face into flat segments, nearly every time I nick myself or irritate the skin, it’s because I get a bit sloppy and take longer strokes that cross segments (the chin/neck zone tends to be the spot that most struggle with). Sometimes in finishing techniques, you need to violate that rule, but in the initial reduction passes, that tends to be where you’re most likely to have some bloodletting…
Very true about the BBS shave. It will come to you (usually, anyway 🙂 ) with proper technique, don’t try too hard to catch it by yourself.
Comments are closed.