

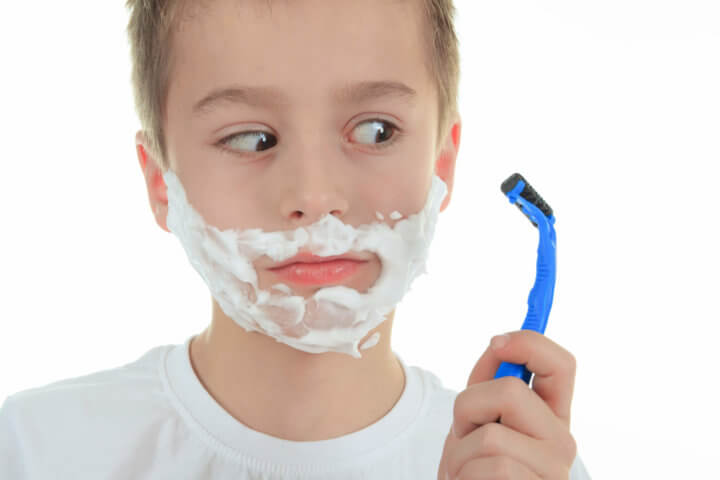
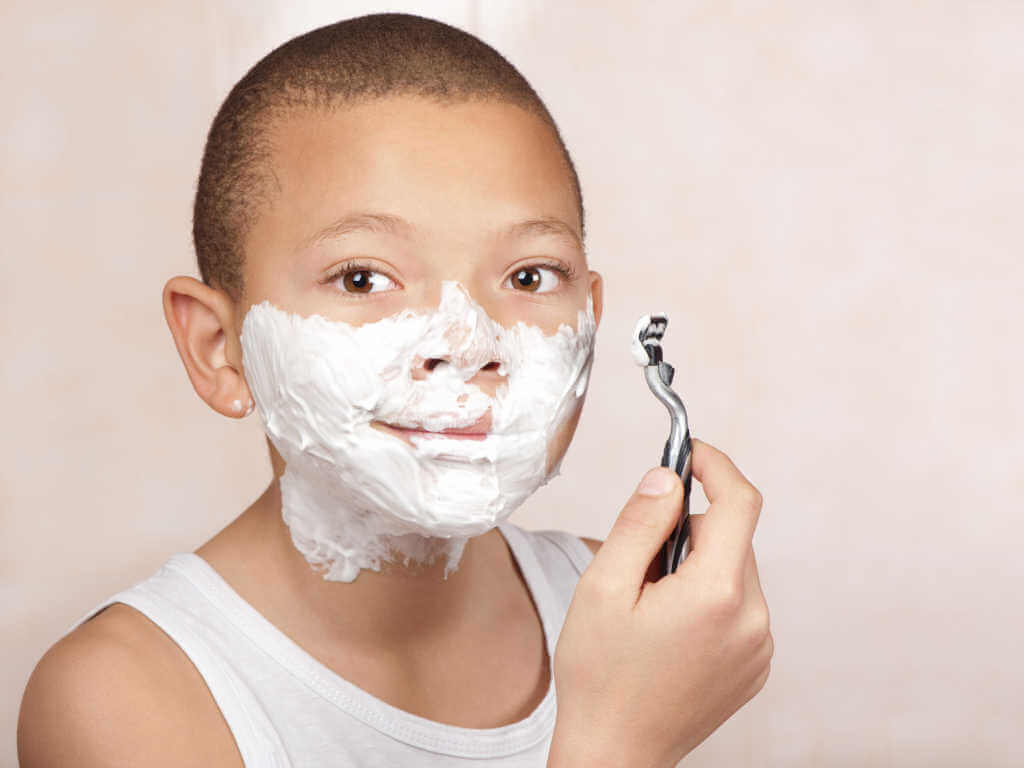
Congratulations! You’ve made it to adolescence. And you have decided it’s time to shave your face. Here is what you need to know and how to go about doing it.
[Note from “Mantic59” – while Sharpologist is all about the the old-school shave for the “shaving aficionado,” every now and then the beginner needs to be recognized and coached. It occurs to me that there isn’t that much information on the ‘net for the kid who needs to know how to shave his face for the first time.]
A Little Background On Hair
To understand shaving you should understand the growth cycle of hair.
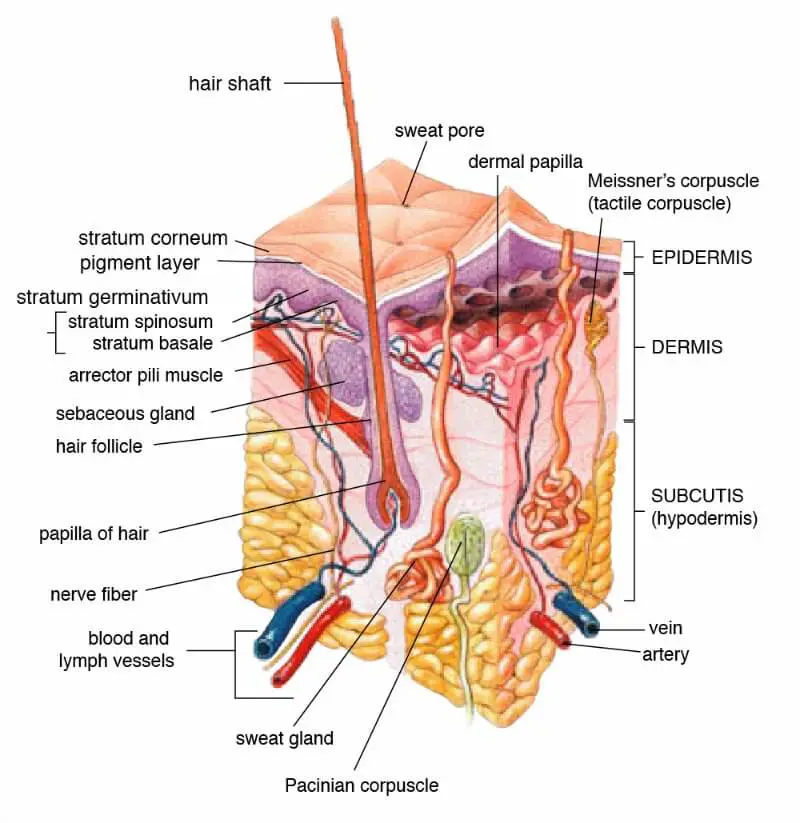
(Click/tap to see image full-size)
Human hair and its growth cycle is surprisingly complex, made up of many parts. But for this article let’s simplify the process by concentrating on just two parts, the dermal papilla and the hair fiber.
The first stage of the hair growth cycle is called the Anagen stage. This is the active growth phase and lasts several years.
Next comes the Catagen stage. This relatively brief phase of about 2 weeks is a natural, carefully controlled death of the hair fiber and the area around the papilla.
Finally there is the Telogen stage, a resting phase of about 3 months where the old hair fiber sheds and the area prepares itself for a new Anagen stage to begin. Each individual hair is governed by its own cycle, which is why you don’t notice all of your hair falling out at the same time.
Your facial hair will probably look more like fluff (“peachfuzz!”) than thick beard hair when it first comes in. It will get heavier and thicker as you grow older.
The Tools
Now that you know how hair grows, here are the major tools used to shave hair off. There are two general methods of shaving–dry shaving and wet shaving.
Dry Shaving
Dry shaving is shaving using a razor that has a motor to power a system of cutting blades. Typically you don’t need any lubrication and you can just run the razor over dry (but clean) skin. There are two basic types of electric razor, “rotary” and “foil.”
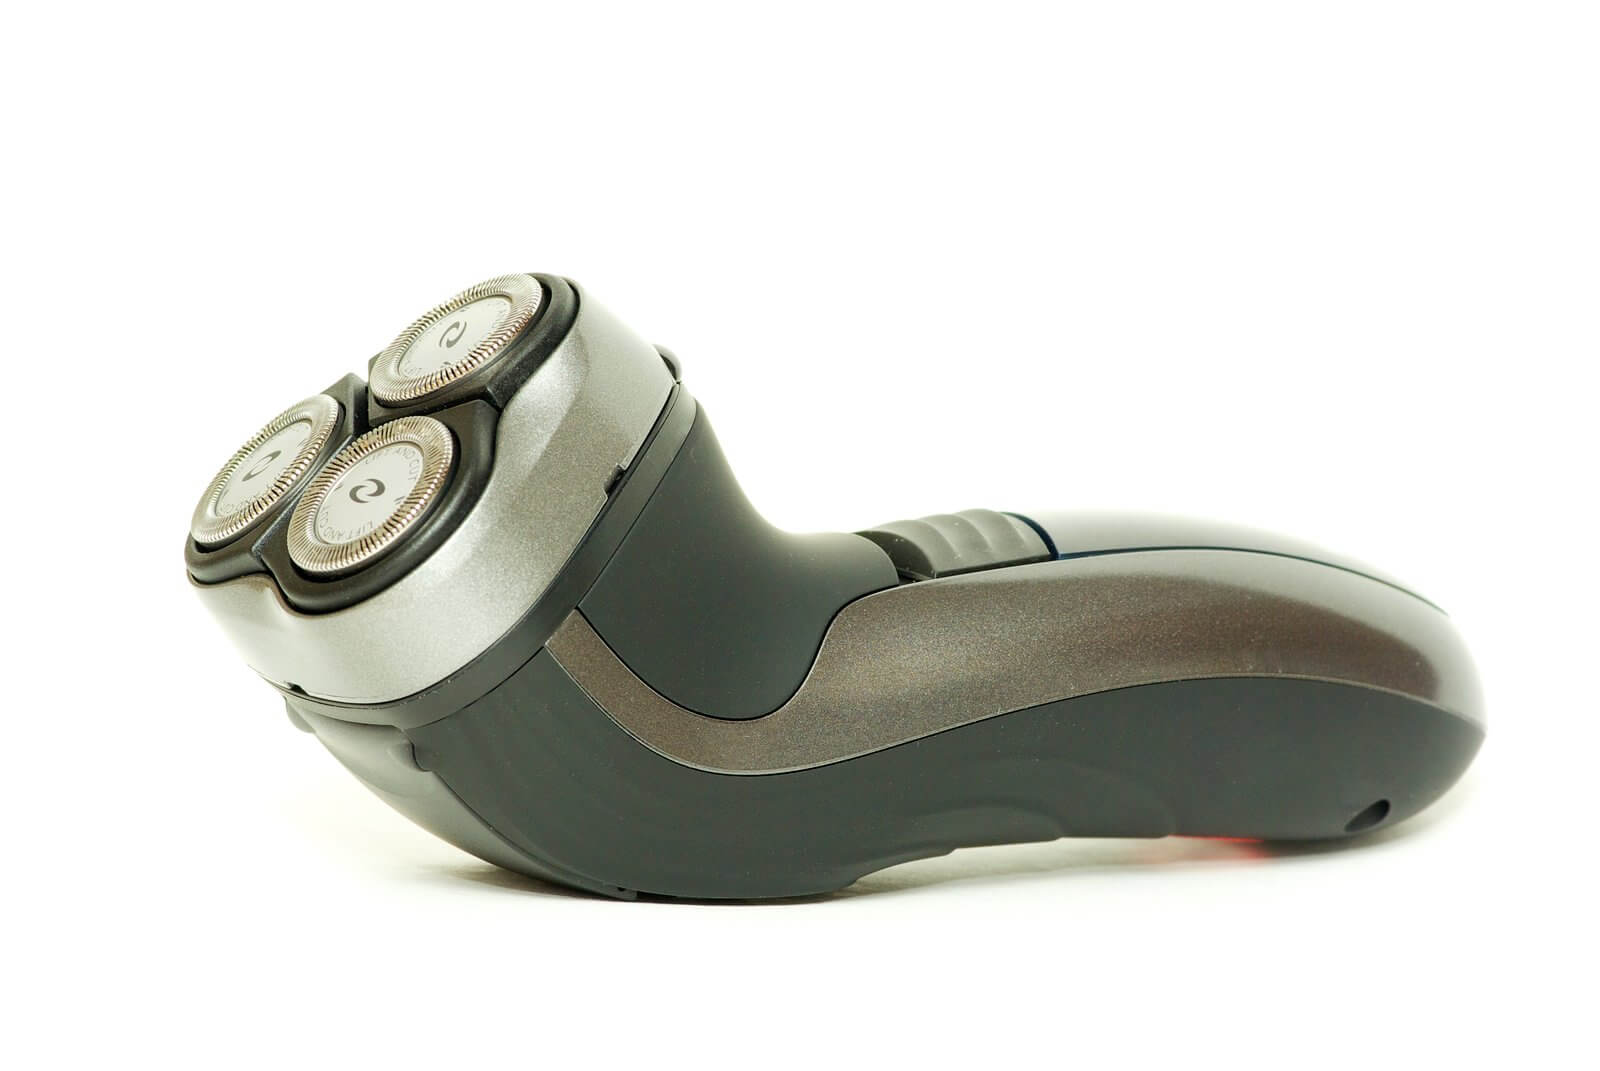
Modern rotary razors, originally introduced in 1939, have an inner, circular-spinning blade that cuts the stubble captured by an outer stationary guard. Several cutter modules can be combined on pivot points to create a razor surface that can follow skin contours. As the razor is moved in a circular motion hairs fall into the angular grooves of the guard and are cut off by small, scissor-like blades. The circular motion can make it easier to maneuver around difficult areas such as the neck or the chin.
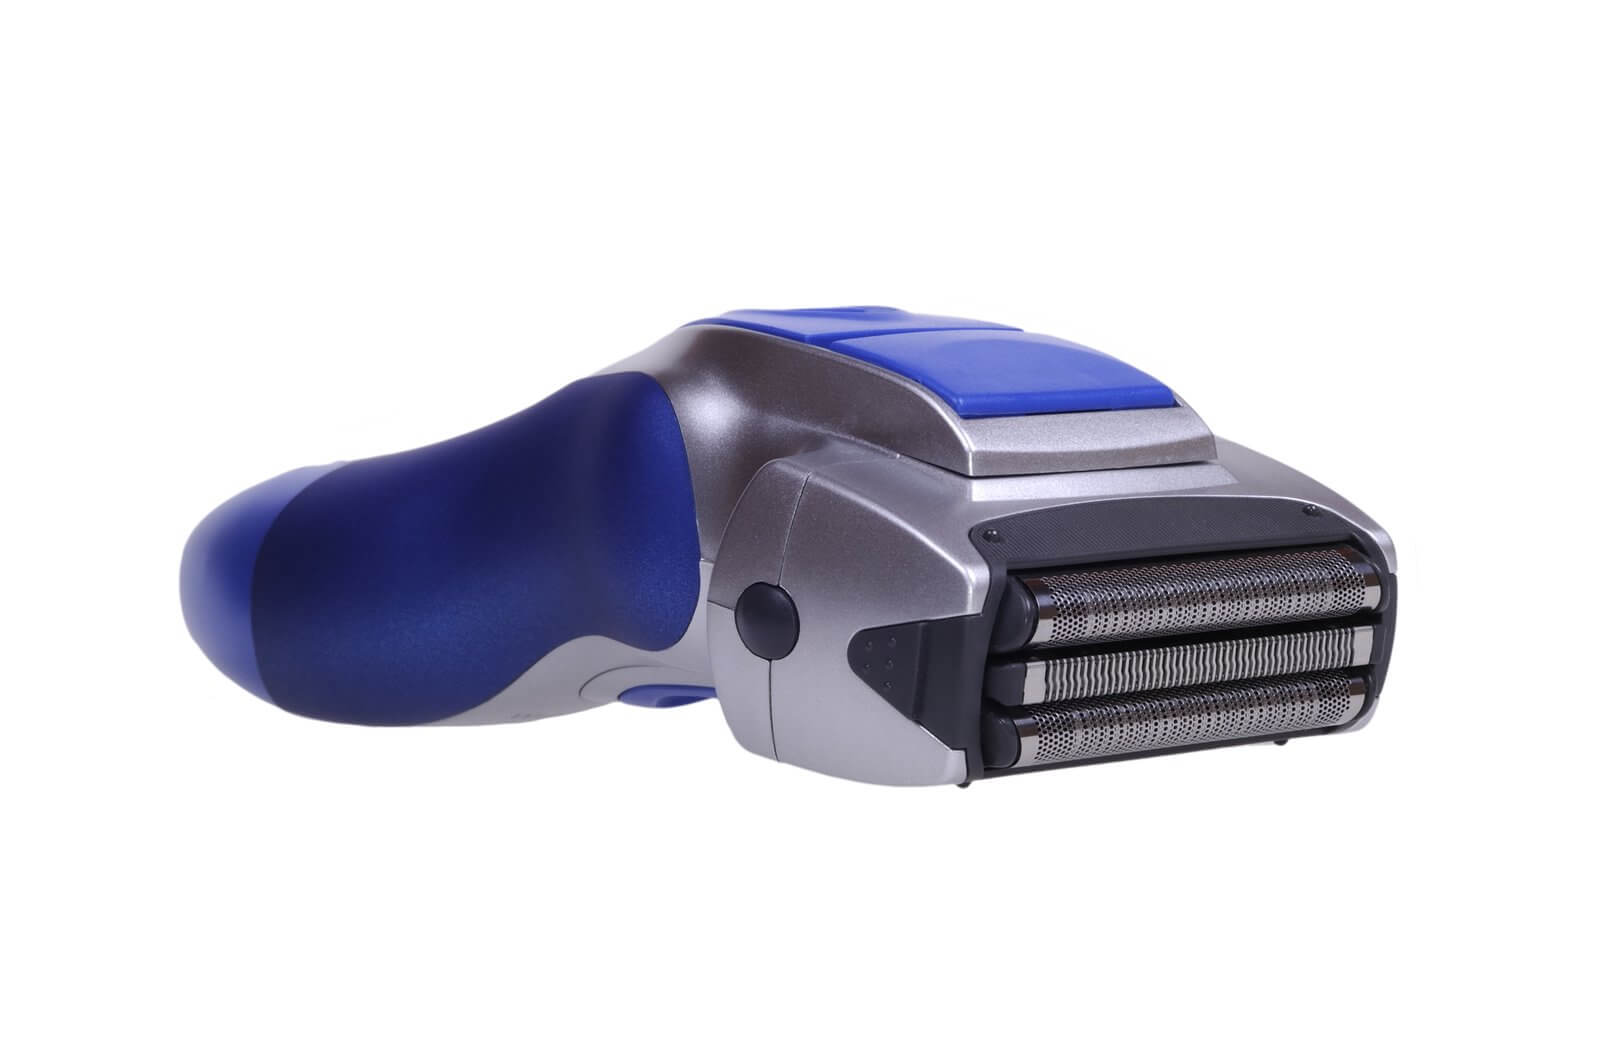
“Foil” (reciprocal) razors use oscillating blades beneath a mesh cover to cut hair. The holes of the foil capture hair, where the blades cut them without coming in contact with the skin. If you have ever seen a reciprocating saw you have an idea how this type of razor works. Like rotary shavers, there can be multiple heads on a “floating” foil that follow the contours of the skin more consistently.
Wet/Dry Electric Razors
The wet shave vs. dry shave debate got a little more confused with the introduction of “wet/dry” electric razors a few years ago. “Wet/dry” electric razors use rechargeable batteries in water-resistant housings along with the ability to use shaving cream or gel like a bladed razor.
Using a wet/dry electric razor with a shave cream may give you a more comfortable shave, and perhaps slightly closer too, compared to a dry-only razor. However many wet/dry electric razors motors (especially the lower-cost ones) drive more slowly (i.e. the reciprocal or rotary actions are slower than their corded counterparts), which can impair performance. Click/tap this link: “Can You Use An Electric Razor With Shaving Cream?” here on Sharpologist for more detail.
Wet Shaving
Wet shaving is removing hair with a sharpened edge and water. Practically-speaking, it’s really about shaving with a manual (vs. electric) razor, with water and some kind of product to lubricate and protect the skin.
Obviously, manual razors have been around a lot longer than electric razors! Here’s a quick overview of bladed razors for shaving:
Straight Edge (“Cut Throat”) Razors
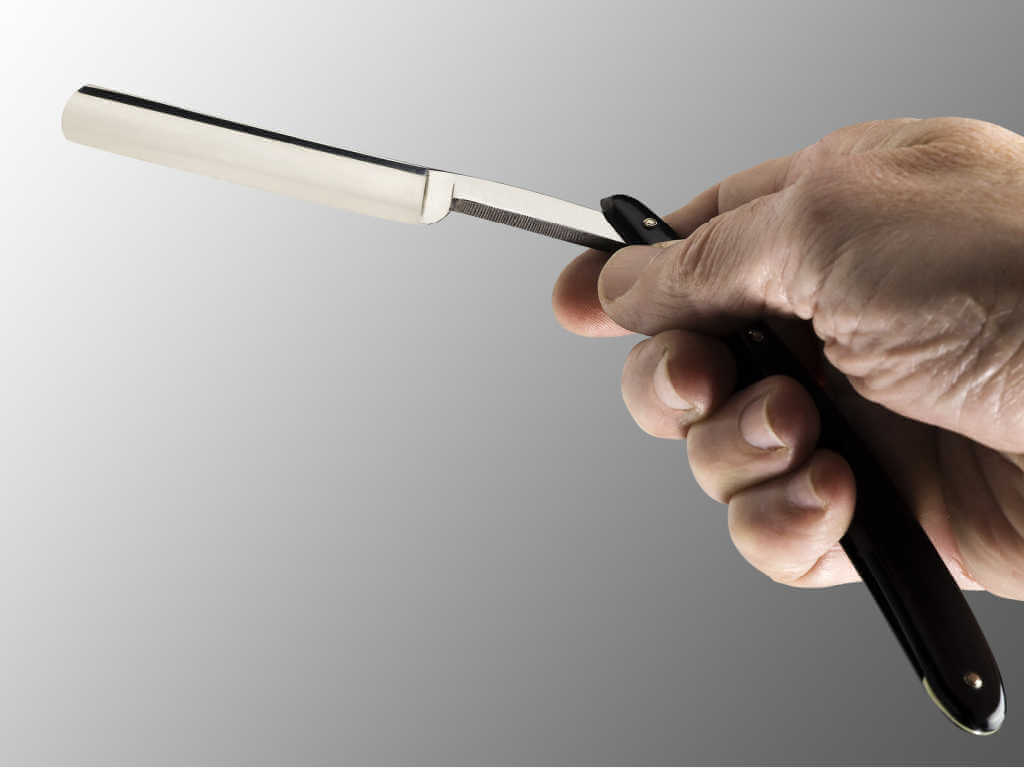
The “modern” razor goes back to the late 1600’s with the development of the “cut throat” razor (AKA the straight razor). Straight razors were the way most people shaved for hundreds of years.
The person using a straight razor must control every aspect of the tool, from the angle at which the razor is held to the geometry of the blade. “Cut throat” razors require regular, careful maintenance.
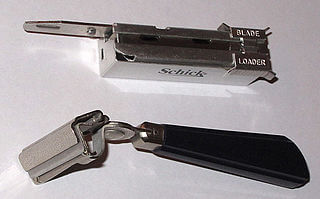
Safety Razors

When most people think of the term “safety razor” they think of the double edge razor and blade from Gillette that your father (or grandfather) may have used. They’re still around, and there are other safety razor designs too–most notably the “Injector” razor most often associate with the Schick company up to the 1970’s:
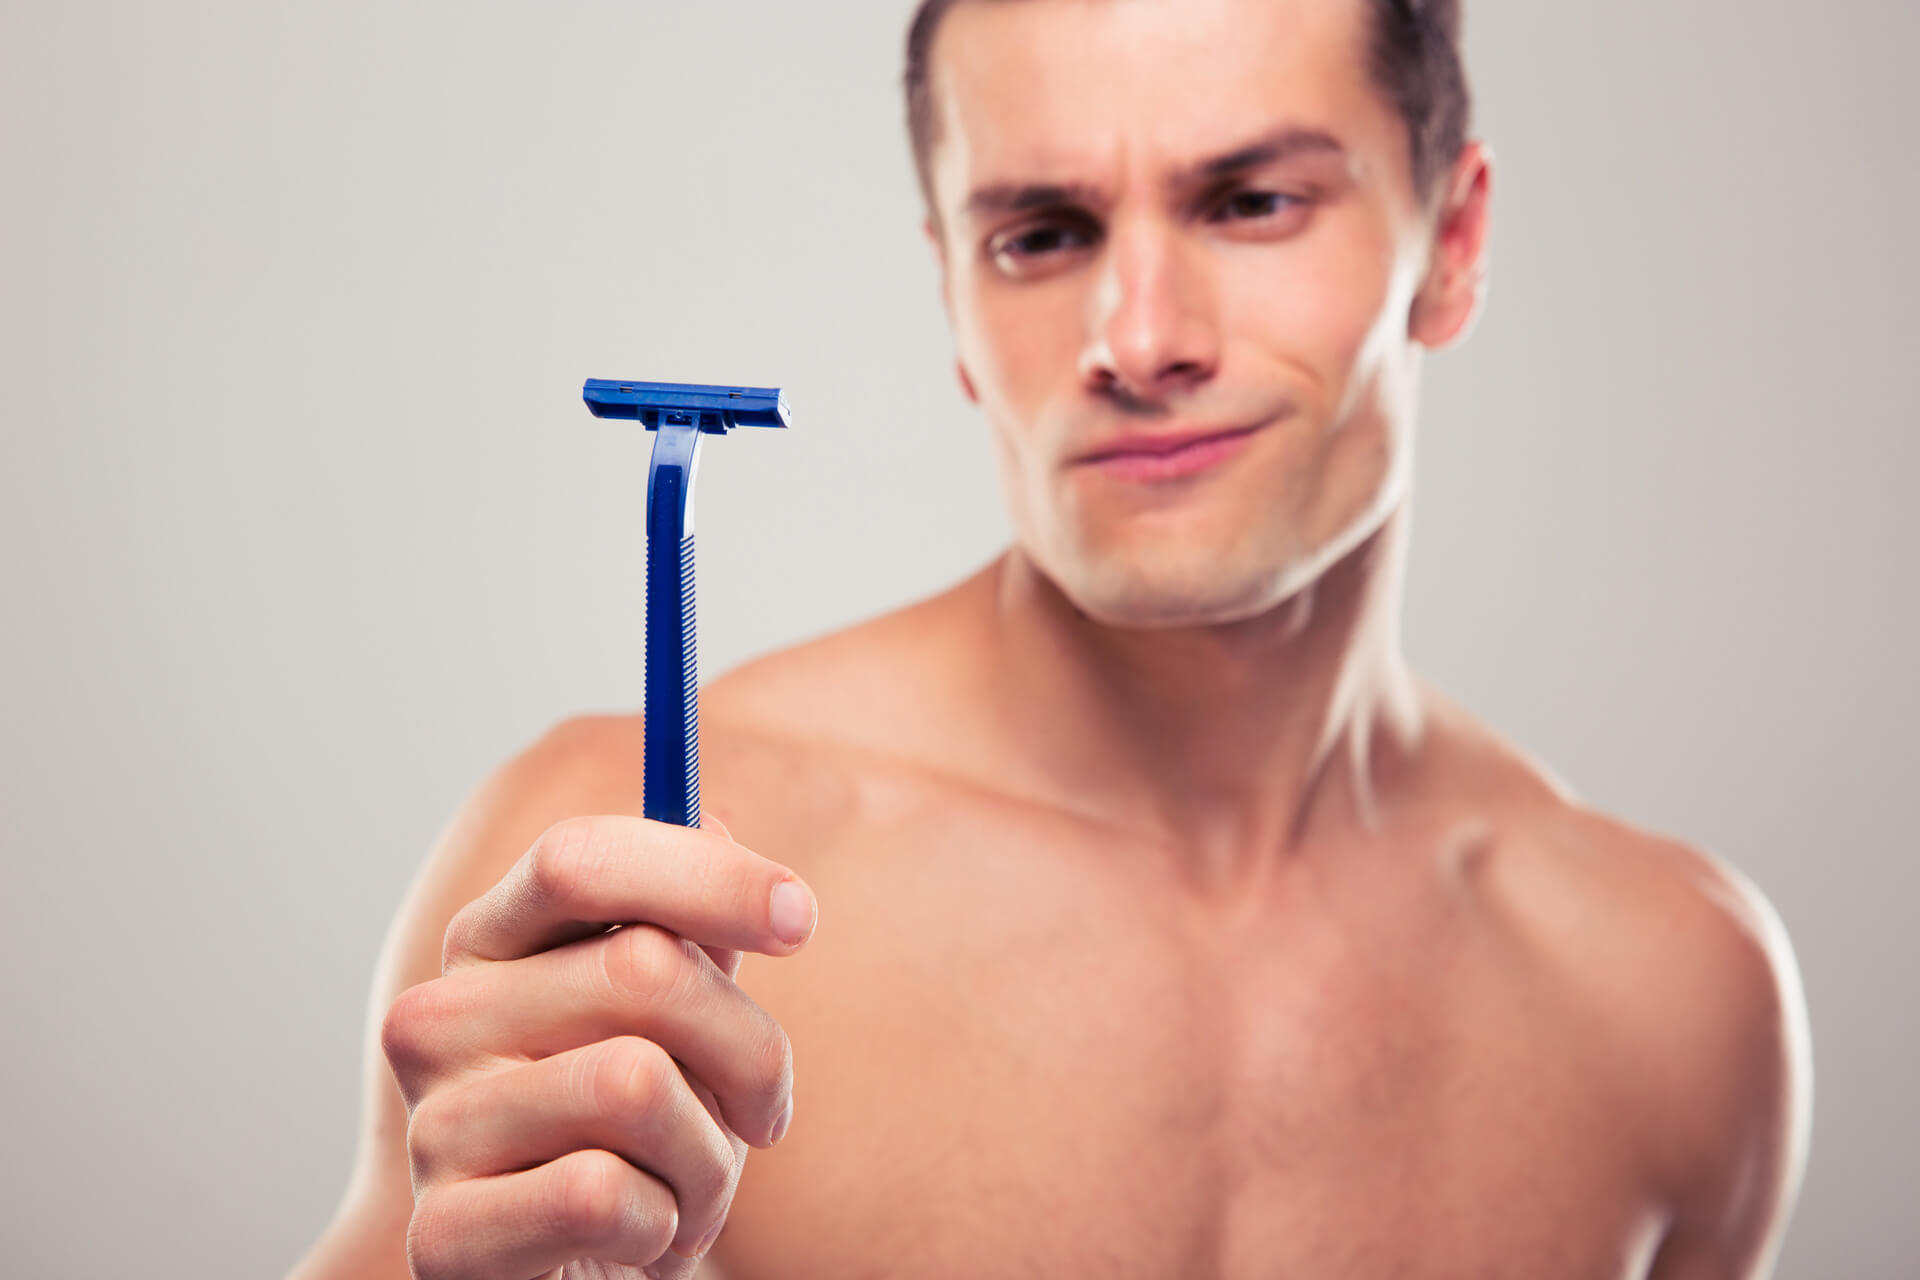
Cartridge Razors
The “modern” manual razor came on the scene in the late 1970’s…coincidentally right about the time certain profitable patents on double edge technology were expiring….

Obviously the most distinguishing features of modern razors are multiple blades in proprietary cartridges. Most of these razors also have some kind of pivot to help compensate for a person shaving with too much pressure on the razor, and to make shaving more consistent around the contours of the skin.
Blade Edge Technologies
Another thing to mention about manual razors and wet shaving are the various aspects of design and engineering of blade edges.
First, the angle to which the blade edge is set in a cartridge (or manually held to by the shaver with a non-cartridge razor).
Second is the “sharpness” of the blade edge. There are levels of “sharpness” that an edge may be ground to, and may even be different for different cartridges of the same type.
Third, non-stick coatings are often applied to blade edges to provide a more comfortable cut.
So Which Is Better?
Given all the choices, which is the “better” way to shave? As with many other things, it’s typically a matter of preference and trade-off:
- Wet shaving will most likely give you a closer shave–but with a higher chance of getting a nick or cut (if you’re predisposed to bleeding problems it may be a good idea to stick to an electric razor).
- Dry shaving requires a reliable source of electricity; wet shaving requires a reliable source of clean water .
- Dry shaving tools generally cost more up front; wet shaving tools generally have a lower initial cost but more on-going costs (e.g. blade replacements).
- Dry shaving is generally faster; wet shaving generally shaves more closely.
An Important Step Before You Shave
You will be shaving throughout your life so it is a good idea to get into some proper shaving (and grooming) habits now: learning now will pay dividends over the years. Each method of shaving has its particular routine–but there are also some things you should do no matter how you shave.
Washing Your Face (And Neck!)

A clean face and neck is very important to a good shave, no matter what shaving tool you’re using! If you’re using an electric (dry) razor your face needs to be clean and dry before you begin; if you’re using a manual (wet) razor your face needs to be clean and wet before you begin.
The right way to wash your face begins with…washing your hands. Why? Because you use your hands to wash your face. If your hands are dirty (contaminated) you risk transferring the bad stuff to your face (cross-contamination).
Wash your hands with the clean running warm water: using running water is better, hygienic and necessary. If you use a basin of standing water which has been used previously, it might be contaminated already.
- Run water to wet your hands.
- Turn off the faucet then apply soap.
- Foam your hands with the soap then rub them together for at least 20 seconds (hum the “Happy Birthday” song to yourself, twice). Be sure to include the back of your hands, between your fingers and under your nails. Foaming and scrubbing your hands builds up friction which makes the dirt, grime and microbes removed faster and more easily.
- Rinse hands well under the clean running water.
- Turn off the facet and dry your hands with a clean towel or air dry them. Even after washing hands, germs can be easily harbored by wet hands. This is why hands should be dried after washing.
If you want detailed information on why washing your hands is important, click/tap here to read “Wash Your Hands (Properly) For A Better Shave.”
Now you’re ready to wash your face and neck. You want to use a cleanser that is specifically made for the face (why? Because “body bars” or “deodorant soaps” can strip off too much of the skin’s natural oils that are needed to make shaving easier and more comfortable). If it comes down to washing the face before a shave with either a body/deodorant bar or just warm water and a (clean!) washcloth, take the warm water and washcloth route until you can get hold of some facial cleanser.
Click/tap here to read “What Is The Best Pre-Shave Face Wash?” for some suggested face washing products, but don’t disregard something that you may already have readily available (even your mom’s Noxzema…).
If you’re going to shave “dry” with an electric razor, let your face dry completely before shaving; if you’re going to shave “wet” with a manual razor, keep the face wet for the shave.
How To Shave Your Face With An Electric Razor (Dry Shaving)

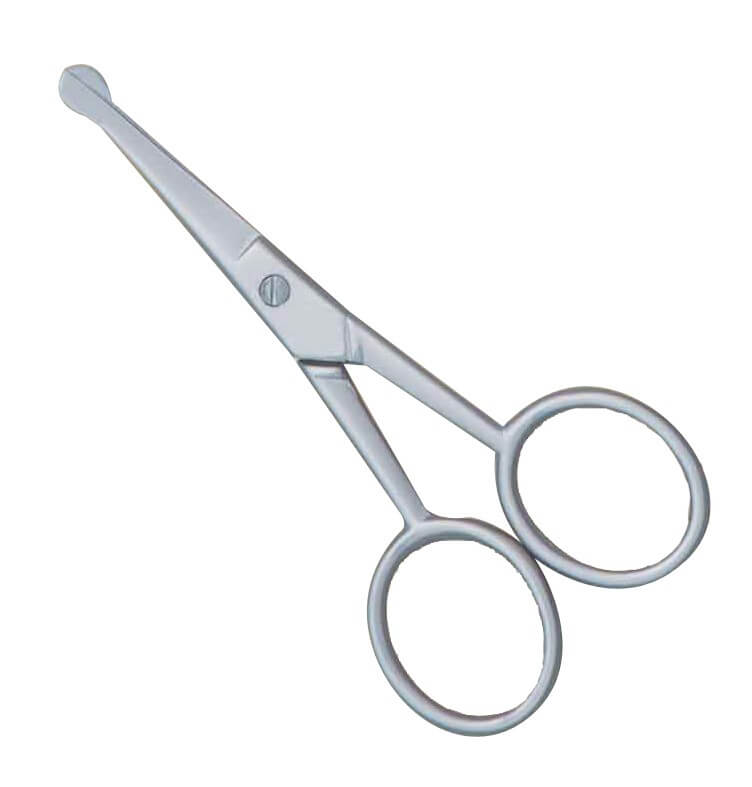
If you have waited until you have some really long stray hairs (like, say, over one-quarter inch long) you will want to trim them down a bit first, as electric razors have trouble shaving really long hair (they tend to pull or pinch painfully). If your electric razor has a sideburn trimmer, use it to cut down the worst of it to shorter stubble. Alternatively you can use a grooming trimmer or even a (BLUNT TIP!) scissors to get that job done:
Now you’re ready to shave. There is a slightly different technique between dry shaving with a “foil” electric razor and shaving with a “rotary” electric razor.
How To Shave Your Face With A Foil Razor For The First Time
Starting with the neck (why? Because as you shave the razor’s motor will start heating up, creating more of a chance for razor burn or irritation. So start with the most sensitive areas like the neck first), use short, light “back and forth” strokes while holding the razor in your dominant hand. Then move on to the sides of the face, shaving the cheeks and jawline.
Be sure to hold the razor’s foil head perpendicular to, and in constant contact with, the skin (but at the same time don’t “bear down” on the razor). You can slightly overlap strokes as you move from area to area but resist the temptation to go over the exact same spot again and again. Don’t worry if the results of your first shave aren’t perfect.
As your facial hair fills in over the next few months and years you may want to use your other hand to gently pull the skin taut to make a flatter surface and shave against the hair’s growth (the “grain”) but don’t worry about that for now.
How To shave Your Face With A Rotary Razor For The First Time
Starting with the neck (why? Because as you shave the razor’s motor will start heating up, creating more of a chance for razor burn or irritation. So start with the most sensitive areas like the neck first), use light, circular motions while holding the razor in your dominant hand. Then move on to the sides of the face, shaving the cheeks and jawline.
Be sure to hold the razor’s head in constant contact with the skin (but at the same time don’t “bear down” on the razor). If after using circular motions you notice some remaining stubble you can try repeating an area (once!) using a side-to-side motion. But don’t worry if the results of your first shave aren’t perfect.
How To Shave Your Face With A Manual Razor (Wet Shaving) For The First Time
Wet shaving with a manual razor has quite a variety of options, as you may have found out if you have browsed around Sharpologist at all. But for the purposes of this article let’s narrow things down into the most-common elements.
Of course, as mentioned earlier, you may not have any choice–someone may have given you an old razor and a can of shaving foam and said “have at it.” But if you do have a choice, and you want to shave with a manual razor, consider:
1. Use a razor with as few blades as necessary to get the job done.
There are aspects of a modern razor’s design that are useful. A pivot can help you shave more consistently over uneven skin and it can help avoid putting too much pressure on the razor. And “pretensioners” (those little “fins” at the base of the blade cartridge) can help hairs “stand up” for a more efficient cut.
But the fact of the matter is not only that you don’t need all those blades but also it could actually be more damaging to your (comparatively) tender, young skin. A ton of marketing money has gone into “the razor blade wars” over the years, and you may actually receive a free razor on your 18th (sometimes 16th) birthday, but it is really an attempt to lock you into a razor’s proprietary shaving system.
Certainly most razors with multi-blade cartridges are over-kill for the new shaver. Consider a razor with fewer blades, such as the Gillette SkinGuard that only uses two blades. Click/tap here for Sharpologist’s review of the Gillette SkinGuard razor.
2. Avoid a shave product that comes out of a pressurized can.
All other things being equal, shave foam out of a pressurized can is probably the least effective choice you can make: the propellant in the can can dry out the skin. Additional ingredients have to be added to make up for the drying effect, which in-turn may cause additional problems for young, sensitive skin.
Get a good shave product that comes out of a squeeze tube for better results.
3. Have a product on-hand that is designed to stop minor nicks and cuts from shaving…”just in case,” you dig?
There are a number of inexpensive products you can buy easily for this: a styptic pencil, “Nick Stick,” or similar product.
“Lathering Up”
Whatever shave lubrication product you decide to use (cream, gel, foam, etc.), follow the product’s directions and apply a coat of it evenly across your face (don’t forget the neck). You don’t have to use so much that you look like Santa Clause but you should make sure that everything you are going to shave is covered.
Wait 30 seconds or so to let the product fully penetrate the hair and skin before you begin shaving.
Shave Technique
Stand in front of a mirror and look at your face. It may be helpful to imagine dividing your face into sections. The idea is to avoid shaving along curved parts whenever possible (while using a razor with a pivot makes shaving along curves easier, it’s good shave technique to give the razor blade(s) a flat surface for the most efficient cut).
Most people start shaving with a manual razor on the side of the face, in front of the ear (the sideburn area), with their dominant hand. Rest the razor’s head gently on the skin and take a stroke of about one inch “straight down.”
Move the razor forward, slightly overlapping the first stroke, and gently take the next stroke.
Continue this way until you have cleared a section of face. Then rinse the razor head and start on the next section.
After you have finished with the final section, rinse your face briefly with clean, warm water and take a look at yourself. If you missed a spot, apply a bit of shave lubricant there and shave just that spot again. Don’t do this repeatedly with the same spot again and again–do it once. If it still looks like there is some hair there, don’t worry about it. Just let it go and save it for your next shave.
Once you have completed shaving, rinse thoroughly with warm water to wash off any remaining residue. Then rinse with cool water to start your after-shave routine. If you need to fix a minor nick or cut from shaving, now is the time to use a product mentioned earlier for that use.
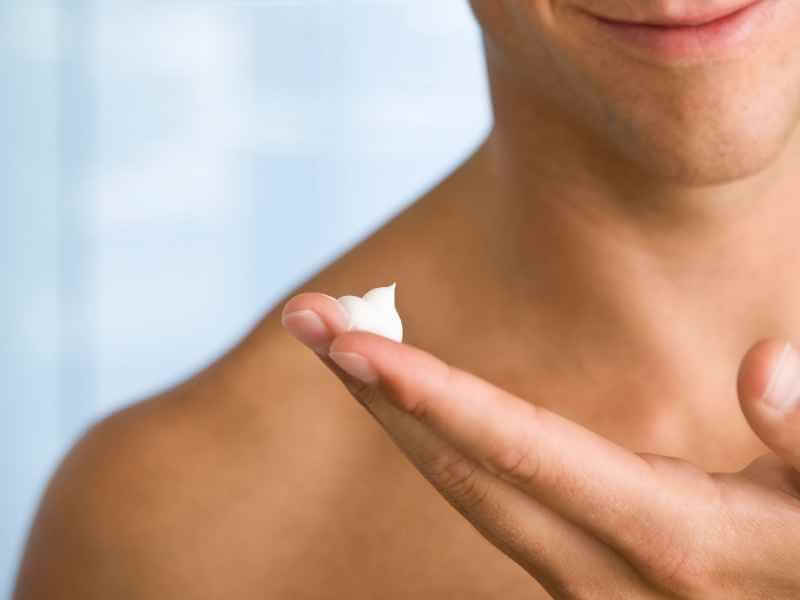
After Shaving – Aftershave
After you have finished shaving you should use aftershave, a product that is applied immediately after shaving to provide some combination of irritation relief, skin moisturizing, and protection from the elements. This is particularly important if you are “wet” shaving.
Balm Vs. Splash
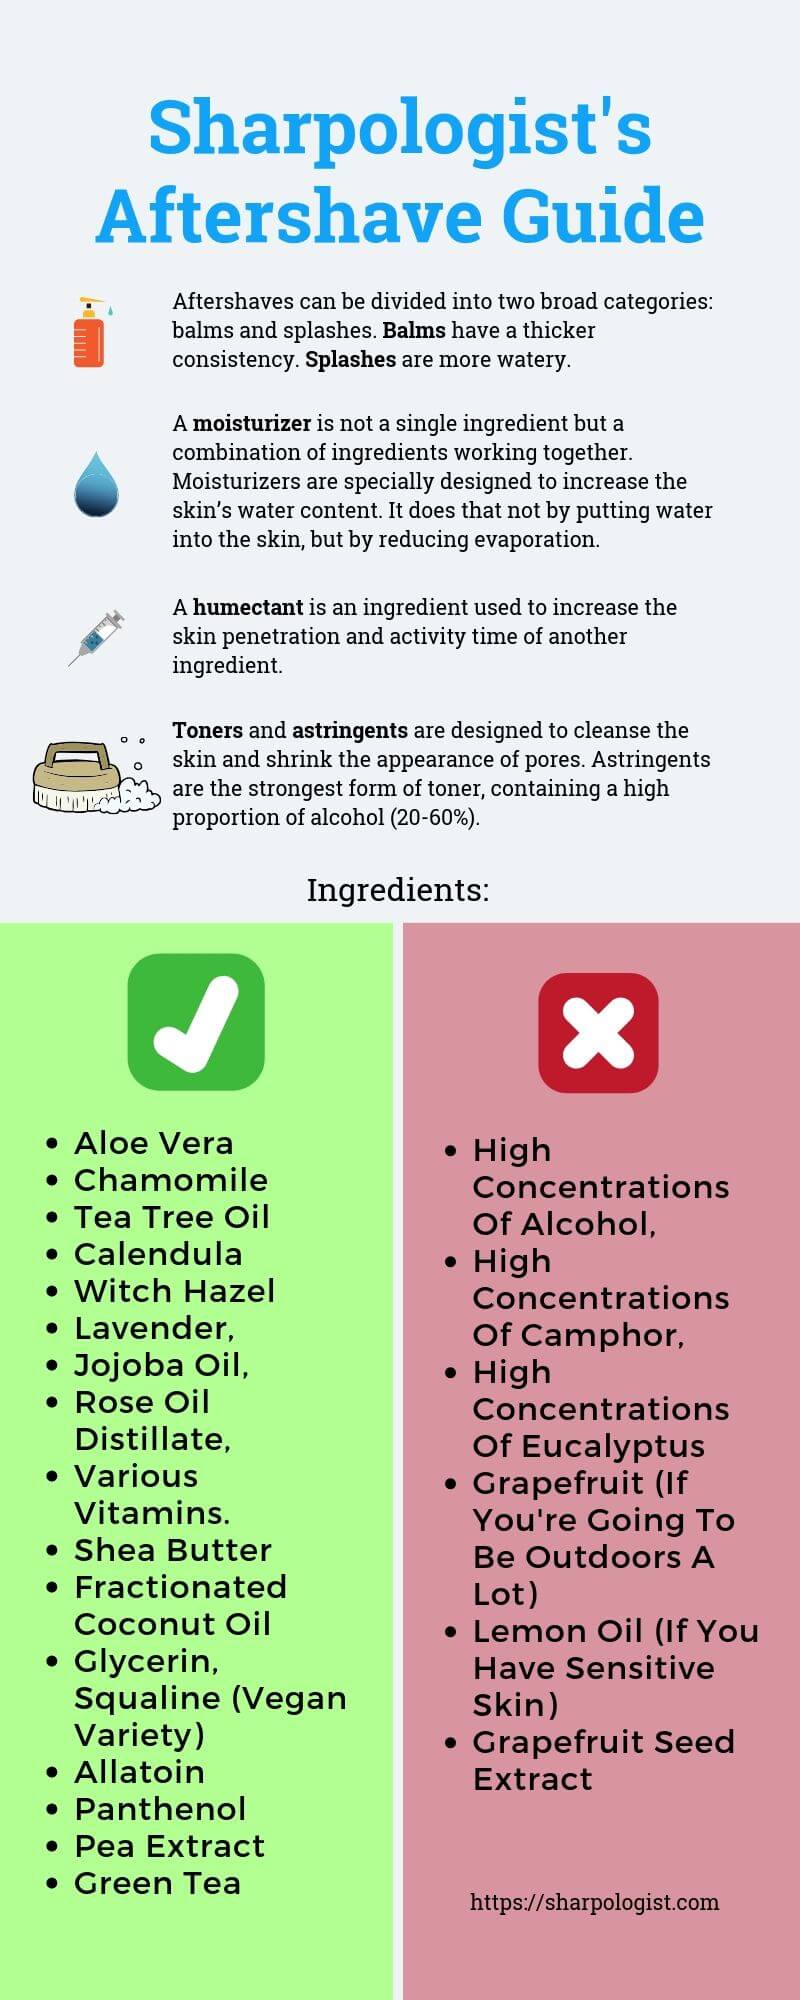
Aftershaves can be divided into two broad categories: balms and splashes.
Balms have a thicker consistency and the best aftershave balms typically provides more irritation and razor burn relief, and act as a moisturizer to the skin (particularly in cold or dry climates).
Splashes are more watery and generally contain a combination of ingredients to cleanse and provide some degree of antiseptic or antibacterial protection to the skin. They’re more popular with those with oily skin or in hot, humid climates and in some cases can be effective at combating razor bumps or ingrown hairs.
“Can I use an after shave balm as a moisturizer?” Yes, absolutely. “Can I use a moisturizer as an after shave balm?” With an electric razor, yes; with a manual razor…maybe.
By the way, a moisturizer is not a single ingredient but a combination of ingredients working together. Moisturizers are specially designed to make the external layers of the skin softer and more pliable by increasing the skin’s water content. It does that not by putting water into the skin, but by reducing evaporation.
“Good” Vs. “Bad” Ingredients
Over the past few years there have been many additions to the list of ingredients that may be found in aftershaves (particularly balms). Ingredients to look for: aloe vera, chamomile, tea tree oil, calendula, witch hazel, lavender, jojoba oil, rose oil distillate, and various vitamins, Shea butter, fractionated coconut oil, glycerin, squaline, allatoin, panthenol, pea extract, green tea, sodium lactate, panthenol, hyaluronic acid, oat protein.
Ingredients to avoid: high concentrations of alcohol and/or lemon oil (especially if you have sensitive skin), camphor, or eucalyptus; grapefruit and grapefruit seed extract (if you’re going to be outdoors a lot); and lanolin.
(Click For Full Size Image)
Alcohol in aftershaves should especially be treated with caution. There are a lot of aftershave preparations out there–particularly in the “splash” category–that contain way too much alcohol. Some men have been taught to “feel the burn” and yes, alcohol can help clean and kill surface bacteria from a shaving cut. But far too many alcohol-based aftershave products do little or nothing to nourish the skin over the long-haul. Go alcohol free.
How To Use An Aftershave
Applying an aftershave is pretty simple.
For a balm, apply a couple drops to moistened fingers and massage into a moistened face. A splash may require a few more drops, also to moistened hands onto a moistened face. The water will help the aftershave cover the face more evenly (and you will need less aftershave compared to applying it “dry.”
Then just let your face air-dry.
Don’t Forget The Clean-up!
After you are finished with your shave, do not leave the area messy!
Clean up your razor. A quick rinse is probably all you need you need for a manual razor. You may need to clean the stubble out of the holding area inside an electric razor (a small brush is usually included with the razor for that purpose). Then put the razor up in some out-of-the-way place.
Put back other products (soaps, cleansers, shaving creams, etc.) where you found them.
Rinse out the wash basin and be sure to wipe up any water spills or splatters with a dry towel.
Shaving With Acne
It’s going to be almost inevitable that you will get acne (pimples, “zits,” spots, etc.) sometime during your adolescence (and even afterward). If you want to get a head start on dealing with it, click/tap here to read Sharpologist’s Guide To Shaving With Acne.
Conclusion
Your first time shaving marks an exciting milestone. Developing good shaving and grooming habits now will serve you well through the rest of your life.
This article will be updated as questions and comments come in so be sure to leave yours below!

Hi Mark.
Good article. It made me remember my first shave. Without the presence of a father, my first shave was a challenge. Where were you then? (Please don’t answer). However, your article did not include the proper scientific term for first facial hair. First facial hair is called, “Peachfuzz”! And, peachfuzz is why I did my first wet shave. Thank you. LOL! 😇
LOL, I added “peachfuzz” to the light hair line near the beginning of the article, thanks! 🙂
The premise is a bit misleading, at least in my experience. I shaved for the first time on my 15th birthday, and at that time I didn’t shave “my face.” The only whiskers available that definitely needed shaving were in the mustache area. Shaving the face on an adolescent youth generally comes 6 to 12 months later than the first shave.
Good point. I probably need to add some commentary about whiskers coming in patch-like.
Harry’s has introduced a new, sharper blade. Have you ever tried a Harry’s razor? I know you like pivots. How do you feel about Harry’s? Can you do a test?
I have seen the announcement but I have not tried Harry’s new cartridge yet. Yes, I plan to do a test.
thanks
Comments are closed.